
How to Verify a Contract on Robinhood Chain: Existing Token or Right at Deploy Time
You’ve already deployed your token and now you want that reassuring green checkmark next to the source code. Learning how to verify a contract on Robinhood Chain is the natural next step after deployment: it’s what turns an anonymous address into a contract anyone can read, audit, and use with confidence. The one detail that trips almost everyone up is simple: Robinhood Chain uses Blockscout as its explorer, not Etherscan, so the process differs slightly from what you already know on Ethereum.
Robinhood Chain is a Arbitrum Orbit L2 that settles on Ethereum, 100% EVM-compatible, live since July 2026, with chain ID 4663 and ETH as the native gas token. This guide covers both routes: verifying directly through the Blockscout explorer, and doing it in one click with Smithii’s ERC-20 Verify tool. Let’s get that badge.
What Does It Mean to Verify a Contract?
When you deploy an ERC-20, the blockchain only stores the compiled bytecode: an unreadable hex string that no human can audit. Verifying a contract means uploading the original Solidity source code so the explorer can recompile it and confirm, byte by byte, that it produces exactly the bytecode living on-chain. If they match, the explorer marks the contract as verified and publishes the readable code for everyone.
- Trust: investors and holders can read exactly what your token does, with no hidden mints or transfers.
- Interaction: a verified contract shows Read and Write tabs in the explorer, so anyone can call its functions without needing the ABI.
- Listings: DEX aggregators, wallets, and listing sites almost always require a verified contract before touching a token.
Verify Your token on Blockscout
On Ethereum and most EVM chains, you verify on Etherscan. On Robinhood Chain, you can’t: Etherscan’s v2 API doesn’t support chain ID 4663. The official explorer is Blockscout, hosted at robinhoodchain.blockscout.com. Any ‘verify contract’ flow, explorer link, or Hardhat/Foundry config you set up needs to point to Blockscout, not Etherscan. Nail that detail and the rest is straightforward.
Blockscout’s verification API for mainnet lives at robinhoodchain.blockscout.com/api. Keep that endpoint handy if you plan to verify from the terminal using a plugin instead of the web UI.
How to Verify a Contract on Robinhood Chain with Blockscout
This is the manual route, straight through the explorer. You’ll need your contract address, the exact Solidity compiler version you used, and your source code (single file or standard JSON input).
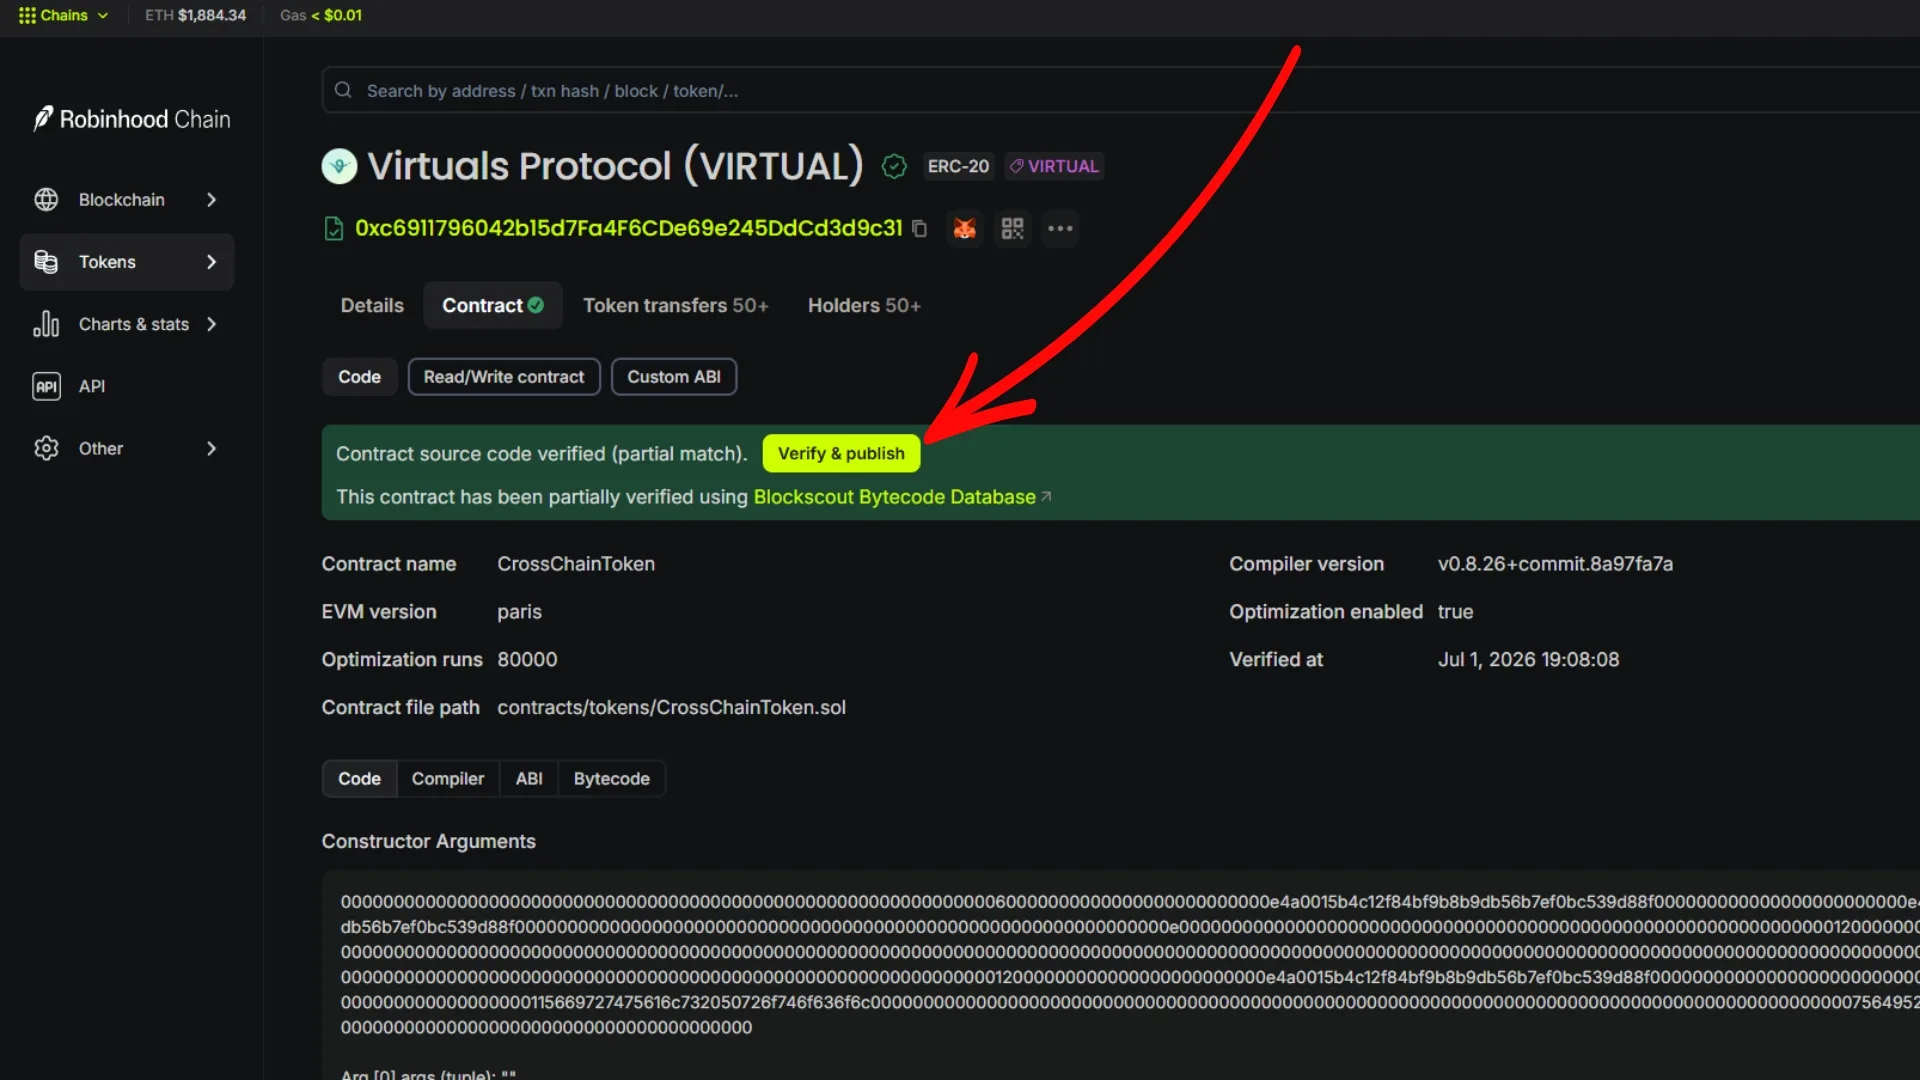
- Open your contract in Blockscout: go to robinhoodchain.blockscout.com and paste your token contract address into the search bar.
- Open the Contract tab: on the address page, click the Contract tab, then hit Verify & Publish.
- Choose your verification method: select “Solidity (Standard JSON input)” if you compiled with Hardhat or Foundry, or “Solidity (Flattened source code)” if you have a single flattened file.
- Match your compiler settings: select the exact compiler version, the same optimization setting (on/off and runs), and the EVM version you used when deploying. A mismatch here is the number-one reason verification fails.
- Upload your code and constructor arguments: paste or upload your code, add the ABI-encoded constructor arguments if your token used them, and submit.
- Confirm the green tick: Blockscout recompiles and, if the bytecode matches, marks your contract as verified. The Read and Write tabs go live. Done!
If it fails, it’s almost always the compiler version, optimization runs, or constructor arguments. Check all three against your deployment artifacts and try again.
When Verification Fails: How to Fix Each Error
Blockscout’s error messages are terse, so here’s what each one means when verifying on chain ID 4663 and how to get past it:
- “Compilation error” or bytecode mismatch: the compiler version or optimizer runs don’t match your deployment. Open your
hardhat.config.jsfor Hardhat or yourfoundry.tomlfor Foundry, grab the exactsolcversion andrunsvalue, and enter them exactly in Blockscout. Even a patch version difference (0.8.24 vs 0.8.25) breaks the match. - “Constructor arguments do not match”: your token had constructor parameters (name, symbol, supply, owner) that need to be passed ABI-encoded. Pull them from the input data of the deployment transaction on Blockscout, or from your deploy script, and paste the encoded string.
- “Contract source code already verified”: good news. Someone already did it. Refresh the Contract tab and the Read and Write tabs will be waiting for you.
- Wrong EVM version: if your contract was compiled targeting a specific EVM version (e.g. paris or cancun), select that same one. Leaving it on “default” when you deployed with a fixed target is a common silent failure.
- Missing imports in a flattened file: if you’re pasting a single file, make sure it was flattened with all OpenZeppelin imports included and no duplicate SPDX license headers. Standard JSON input sidesteps this entirely, so use it whenever you can.
If all five check out and it still fails, the fastest fix is to skip the manual matching and let a tool read the metadata for you.
How to Verify a token on Robinhood Chain with Smithii Tools
Not everyone saves their compiler settings, and matching them by hand is a pain. The dApp we’re using is called ERC-20 Verify. It works like a one-click verification assistant that talks to Blockscout’s API for you, so you don’t have to remember which optimizer runs you set three days ago. If you created your token with the Token Creator by Smithii, the code and compiler metadata are already on file, and verification comes down to a single confirmation.
Hiring a dev to write and verify a smart contract runs $200 or more. Smithii flips that: you create your token for 0.03 ETH (around $35) and code verification is free, with no coding required between you and the green tick. That’s the whole point of the Smithii suite: opening the crypto ecosystem to everyone. The native gas on Robinhood Chain is ETH, so every on-chain step is paid in ETH.
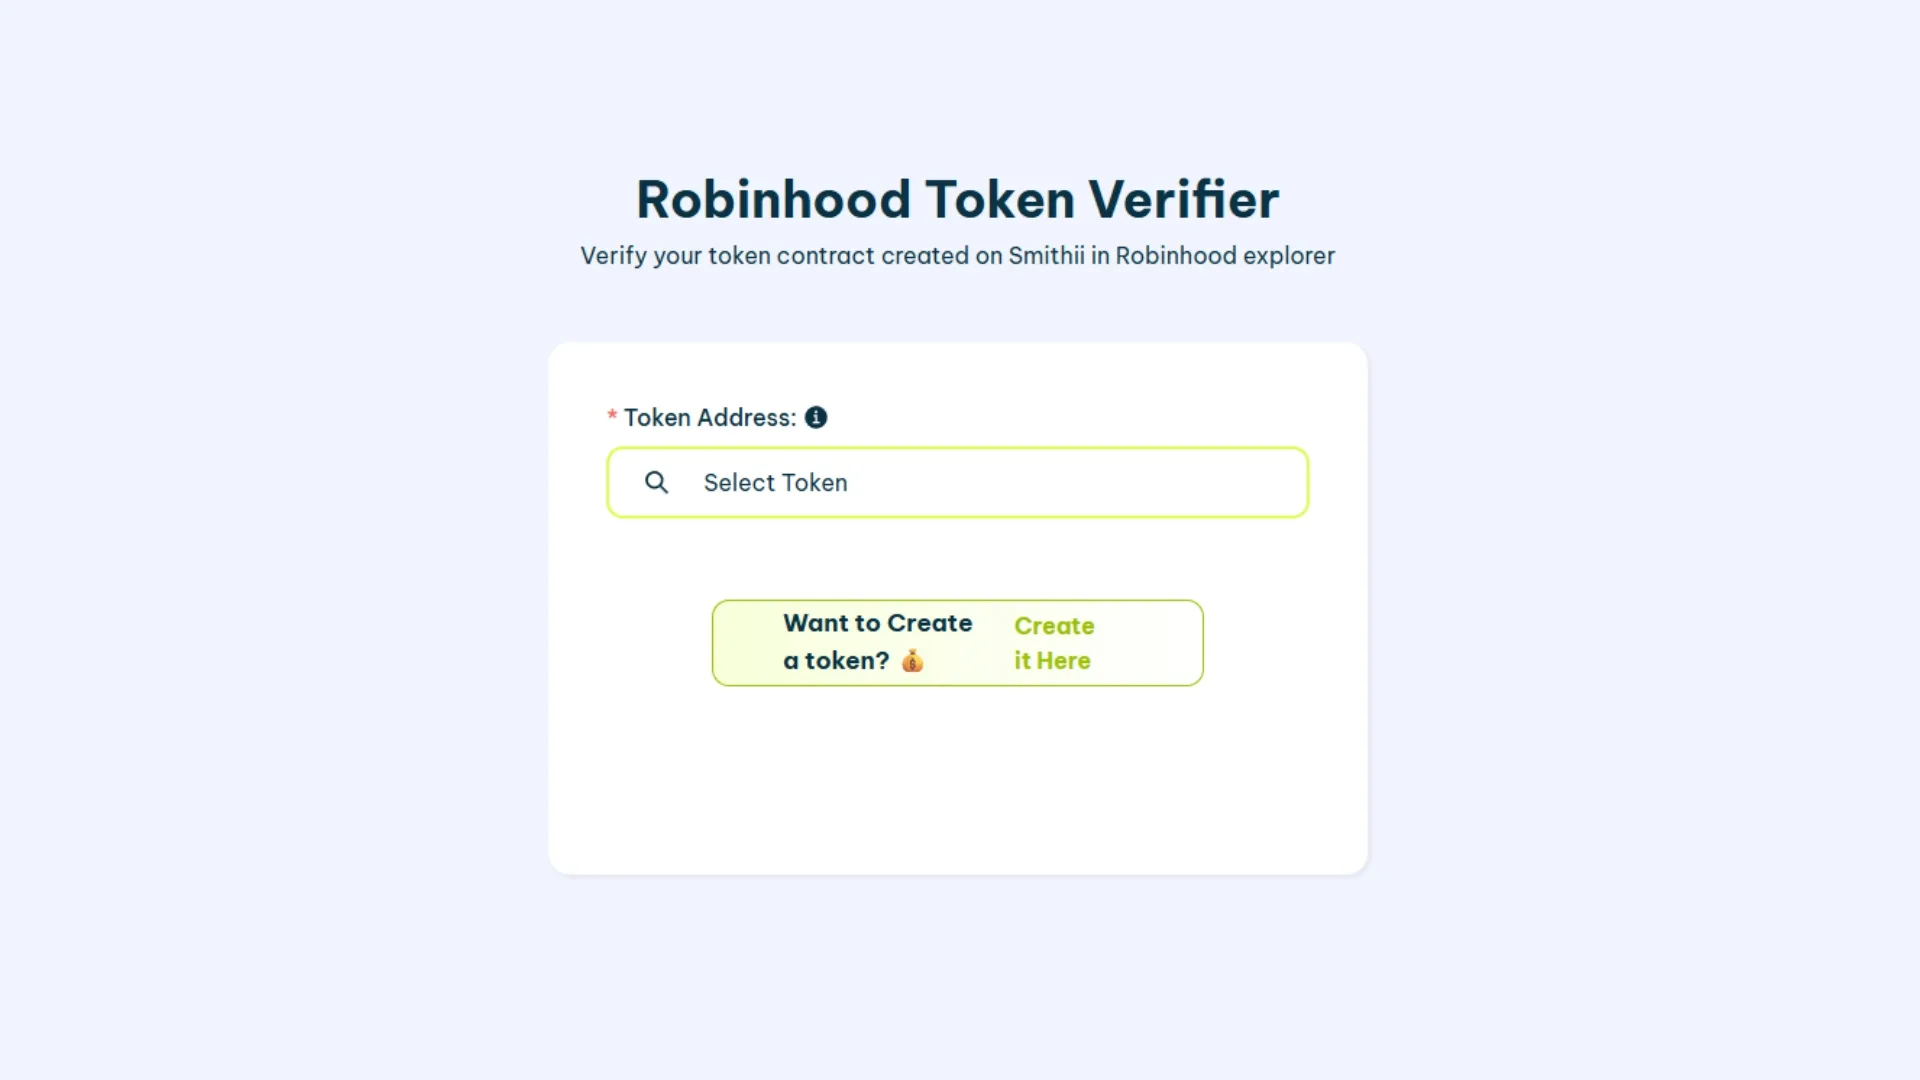
- Open the tool: head to the Robinhood Token Verifier page on Smithii for Robinhood Chain.
- Connect your wallet: connect the wallet configured for Robinhood Chain. If you haven’t added the network yet, our guide to adding the network walks you through it.
- Paste the contract address: enter the token address or select it from your wallet.
- Confirm and verify: the tool submits your code to Blockscout and returns the result. Refresh the explorer and you’ll see the verified badge.
What to Do Before Verifying
Verification only works if you already have a deployed contract. If you still need to create the token, start there:
- Create your ERC-20: deploy the token in minutes with our guide to creating a token on Robinhood Chain (fee: 0.01 ETH + gas fee).
- Going for a memecoin? Check out our meme coin on Robinhood Chain tutorial.
- New to the network? Read what Robinhood Chain is to get up to speed on the L2, the DEX (Uniswap v2/v3/v4 + UniswapX), and stablecoins like USDG and USDe.
Also worth checking out: once your contract is verified, distribute it to your community by doing a airdrop of your ERC-20 tokens and give it an identity with logo and socials.
FAQ
Can I verify a Robinhood Chain contract on Etherscan?
No. Etherscan’s v2 API doesn’t support chain ID 4663, so verification on Robinhood Chain has to go through Blockscout at robinhoodchain.blockscout.com. Any Etherscan-based workflow simply won’t recognize the chain.
Why does my verification keep failing?
The usual suspects: a mismatched compiler version, wrong optimization settings or run count, and missing or incorrect constructor arguments. Match all three to your deployment artifacts and the bytecode comparison will pass.
How much does it cost to verify a contract?
Verifying source code on Blockscout is free. You only pay standard gas in ETH, which Robinhood Chain uses as its native token for on-chain transactions. Verification itself is a read operation that publishes your code without moving any funds.
Do I need to verify if I used the Token Creator from Smithii?
It’s worth doing to get your code public on the explorer. Since the Token Creator already knows the exact compiler settings, the ERC-20 Verify tool from Smithii can push everything to Blockscout in one click, with nothing to remember or match by hand.
What’s Robinhood Chain’s chain ID and gas token?
Robinhood Chain mainnet is chain ID 4663 and uses ETH as its native gas token. It’s an Arbitrum Orbit L2 that settles on Ethereum and is fully EVM-compatible, so standard ERC-20 tooling works as soon as you point it at the Blockscout explorer.
Conclusion
Verification is the trust step that turns a raw address into a token people are willing to hold and trade. On Robinhood Chain, the one thing to keep in mind is that it goes through Blockscout, not Etherscan. From there it’s a handful of clicks, or just one with the ERC-20 Verify tool from Smithii. Now that you know how to verify a contract on Robinhood Chain, it’s time to launch and let your community read the code for themselves.
The Complete Robinhood Chain Kit
Everything you need to launch and grow a project on Robinhood Chain, no code required, with Smithii:
- Get started: What is Robinhood Chain · best wallets
- Create and launch: create a token · create a meme coin · create a liquidity pool
- Distribute: token airdrop · airdrop and testnet guide
- Manage and verify: add logo and socials · verify your contract · view the holder list
- Grow: volume bot · market maker
- Flap volume bot · Trench volume bot · Bankr volume bot

CEO & Co-Founder at Smithii. Building on Solana since 2021 and sharing playbooks from the trenches. Also founder of Lince after years investing in DeFi.