









How to Create Solana Token: Guide for Project Creators
In this post I’ll walk you through, step by step, how to create a Solana token for your project, so you can tokenize, control the supply, and run airdrops down the line.
What we’ll cover in this guide is how to deploy a Solana token SPL, the standard Solana format. There’s another protocol that supports extensions called token 2022, but right now it’s not widely used.
The good news is that these days you don’t need to know how to code. You can do it just by clicking a couple of buttons that deploy your smart contract with the info you enter.
I’ll show you how to create the token and get it into your wallet. Then I’ll share my recommendations for launching your Solana project, and finally we’ll go over the legal side, which is really important.
What is a Solana token
A token on Solana is a fungible and tradable asset under the SPL protocol, designed to serve as any of the following:
- Utility Token: Many platforms and dapp need internal tokens to function
- Governance Token: Tokens that represent an ecosystem; their value often reflects how the community feels about it.
- Meme coin: Assets backed by speculation and community sentiment.
Each of these paths calls for a different plan. With meme coins, you need to build as much trust as possible with the community. That means putting together a Roadmap, tokenomics, whitepapers, everything that adds transparency and credibility.
For utility tokens, you need to tailor the supply and the number of decimals to fit the dApp that will be using them.
How to create a token on Solana: step by step
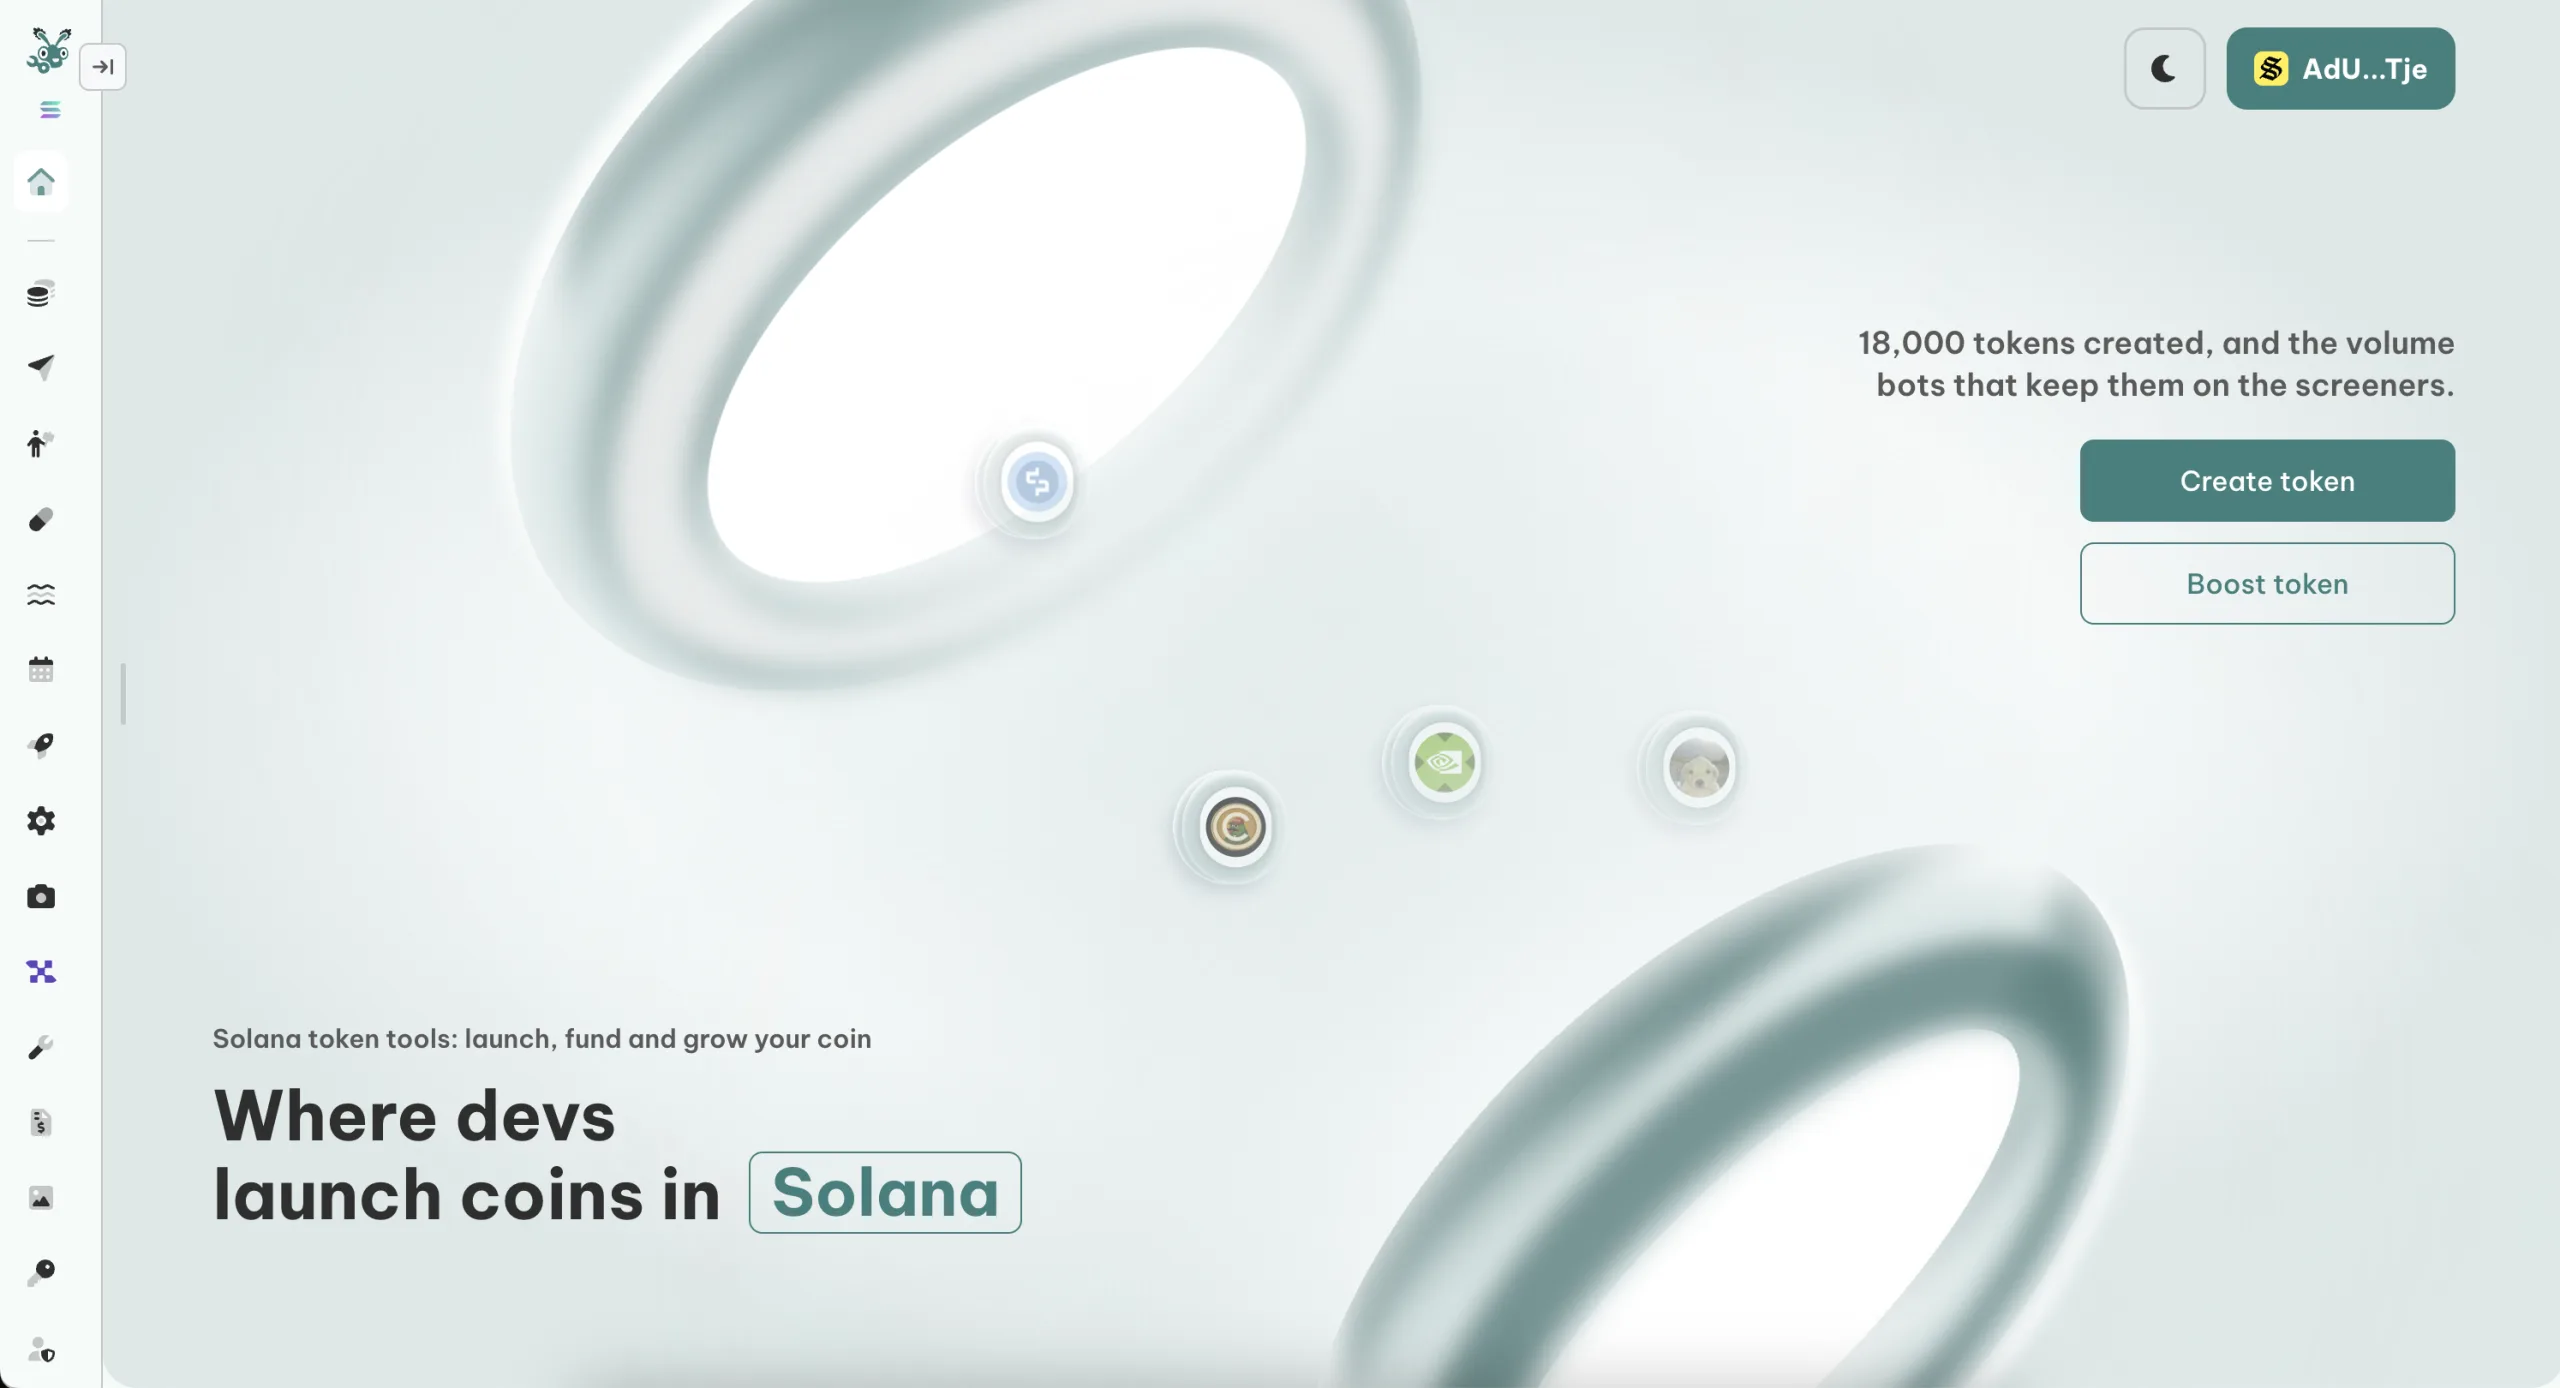
This part is simple but key to your journey. First, open the Solana Token Creator tool, an online program that lets you create a custom Solana token. You’ll see an interface like this:

Now, just follow these steps to launch your token on Solana:
- Connect your wallet (don’t have one? Check out our top Solana wallets).
- Give your token an identity by adding its name, symbol, decimals, initial supply, description, and image (if these terms don’t ring a bell, we break them down later in this same post).
- Optional: Add social links like Website, Twitter (X), Telegram, and Discord.
- Optional: Revoke Freeze, Mint, and Update to build more trust.
- Click “Create Token” at the bottom and approve the transaction from your wallet.
That’s how you create a token SPL without coding. Smithii gives you direct links to the Mint transactions so you can verify the creation. Either way, this is how your token Solana will show up in the wallet you connected:

Key things to consider when launching a token on Solana
Earlier we mentioned you need to fill in the required fields to give your token Solana its identity. If you’re not sure what we meant, we’ll make it easier below.
The most important thing of all when launching a token
Without a doubt, community is everything. If you launch a meme coin with a killer meme idea and a strong community behind it, you’ll hit every goal you set.
Same goes for utility tokens. They gain value through adoption, and that only happens with a strong community. The community will always do the organic work for you, and that’s something most people don’t say out loud. There’s no better airdrop than a community sharing memes across social media.
To earn the community, beyond giving them something useful (a meme or a solid utility token), you need to be as transparent as possible. Right now on-chain, transparent and trustworthy projects are scarce. If you’re launching something legit, use every channel available to let your community know.
You still can’t sell the token
Once you create a token, the full supply lands directly in your wallet, but that alone doesn’t mean you can sell it.
To sell a token, you need to create a pair or market through a liquidity pool, where your market will take a slot on Solana’s smart contract so people can see the token on DexScreener (or any other screener) and trade it.
Listing on different Dex
Listing on DexScreener happens automatically when you create the liquidity pool with smithii. After that, your goal should be listing on bigger dex like coinmarketcap and coingecko, which will give you a lot more visibility.
To get there, it helps if you’ve already built some market cap in the market.
The parameters of a Token
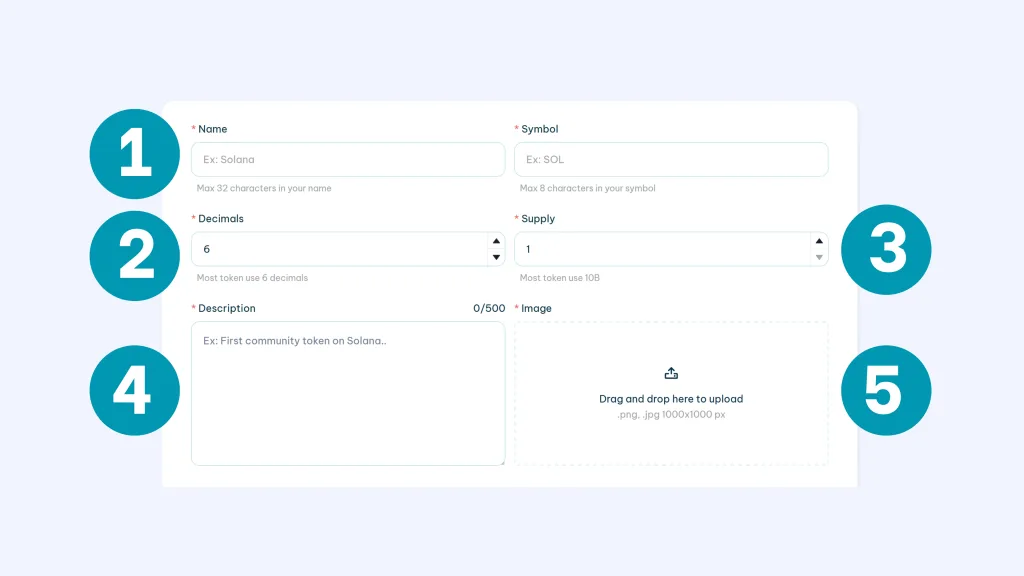
Below I’ll walk you through the main parameters for a token:
1. Name and symbol
These are the most visible face of the token Solana. The name will show up on exchange platforms (DEXes or analytics sites like Dexscreener). The symbol is the short form you’ll use to refer to the token. You can pick any name as long as it stays within the character limits.
2. Decimals
Creating a token on Solana also lets you choose how many decimals your token can be traded with. 6 decimals is the standard, so you can leave this value as is.
3. Supply
Supply is the amount of tokens that will exist at launch. In this case, we suggest going with a figure between 1 and 10 B (nine zeros) so you can reserve a portion for creating a liquidity pool, airdrops, staking rewards, and plenty of other uses.
Smithii has every tool you need to create a SPL Token and handle everything that comes next. Check out our tool lineup and blog to learn more.
4. Description
The description is where you lay out the purpose of the token, so it should be a clear and simple message that gets others to buy in.
5. Image
To give your Solana coin more personality, add an image that represents it.
Making the token tradeable
After creating your own token on Solana, the next step is making it tradeable. You do that by creating a liquidity pool on Solana. You can find the dApp among Smithii’s tools, and you’ll definitely need the token already created plus funds for liquidity.
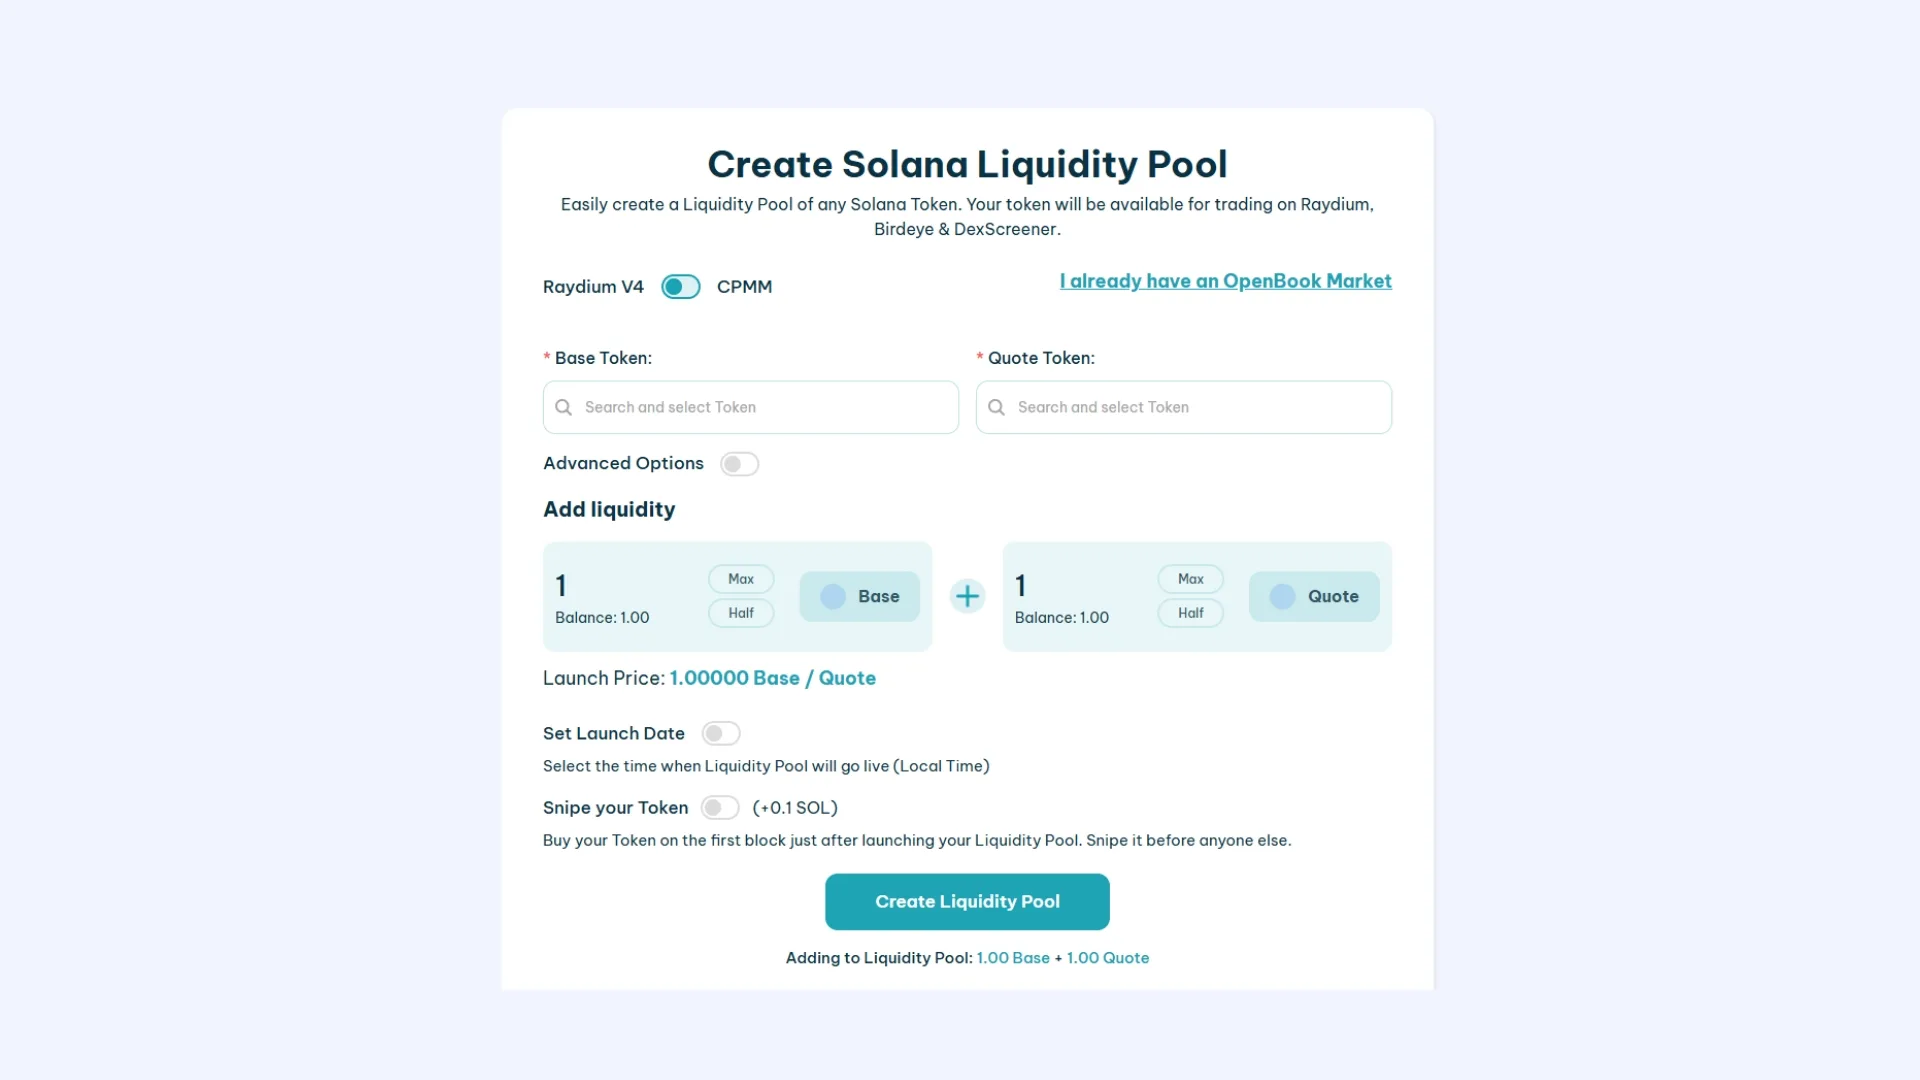
Once you’ve created a liquidity pool, your token is tradeable on Raydium and screeners. This step is critical, since a token on its own can’t be traded without liquidity backing it. That’s why some developers implement a token tax to add liquidity as the token gets traded, or just go straight to a launchpad. We cover both options next.
Taxes with a SPL Token 2022
Unlike the standard SPL Token, the SPL Token 2022 lets you add a percentage fee so you collect a cut on every transaction. It’s especially useful for funding the project, rewarding holders, or adding liquidity. If you’re interested, check out our guide to creating a token SPL 2022.
How much does it cost to create a token on Solana?
Smithii makes it easy to launch tokens on Solana with zero coding, at a fixed cost of 0.5 SOL minimum, plus gas fee. If you want your token to be tradable on a DEX like Raydium, you’ll also need to create a Liquidity Pool, which costs 0.25 SOL, not counting the Raydium fee and the Openbook Marked ID. On average, the traditional route can run you at least 3.3 SOL.
If you want to learn how to create a meme coin on Solana, we’ve got a dedicated guide for it. There we show you how to create your coin without having to create a liquidity pool, using any of the popular Solana launchpads.
Is it better to create it this way or launch on Pump.fun?
If your token is a utility token or integrated into a dApp, launching it this way is the better move. You’ll keep control of the supply, which means you can mint if the project needs it or lock liquidity.
If you’ve got less capital, want a faster launch, and you’re in the memecoin space, Pump.fun is probably your pick.
How many tokens actually make it on Solana?
Great, you’ve learned how to create a token on Solana, but how long does it take to be considered “a success” in the ecosystem? The reality is more complicated. According to data from CoinGecko, memecoins on Solana hold a market cap of $81,556,664,576 USD, and just the top 10 add up to $64,176,137,142 USD. In other words, nearly 79% of total market cap belongs to the top 10 (and we won’t even start on the top 100).
If we head over to Solscan Analytics, you can see that an average of 40,000 SPL tokens get created daily. So if 70% of the market cap is concentrated in the top 10 tokens, what do you think happens to those 40,000 tokens launched every day?
With Smithii you can create SPL tokens without coding, but the success of your token depends entirely on your project. You can also use extra tools like a Solana Volume Bot to support your growth strategies.
FAQ about creating tokens on Solana
At Smithii we make it easy to create Solana token in just a few steps, with no need to be an expert or know how to code. We’re also aware of the common questions that come up in the Solana ecosystem, and we’ll answer them below.
How much does it cost to create a token on Solana with Smithii?
The base price is 0.5 SOL + gas fee, but you can add extra features like Revokes, which bumps the cost up to 0.6 SOL (and it’s the recommended setup).
Is it safe to use the Solana Token Creator?
Yes, Smithii guarantees the security of your wallet. We don’t hold any assets and don’t share information related to tool usage. Plus, we’ve got a support team ready to handle your questions and any issues 24/7.
The Smithii team is doxxed and we’ve been running as a dApp since 2023.
How can bots drain your liquidity?
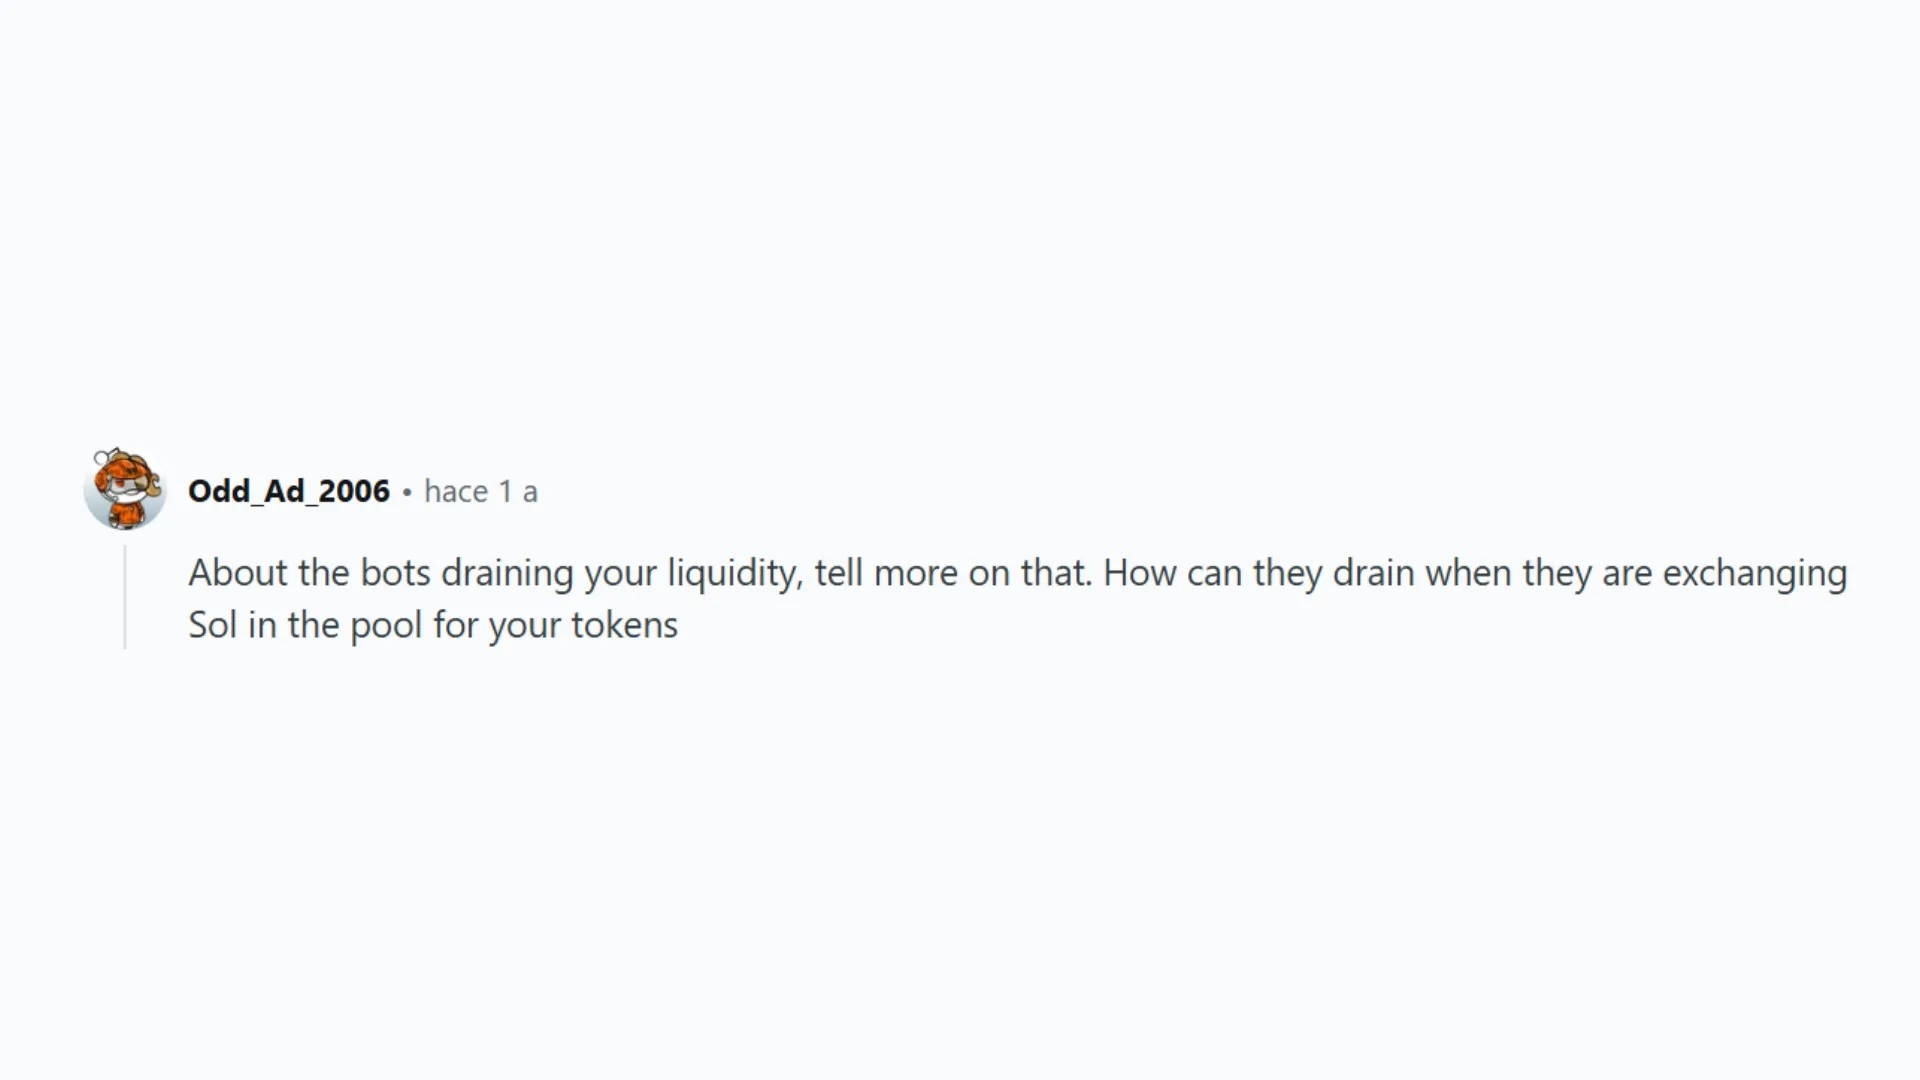
sniper bots are automated programs that constantly scan for new liquidity pool to instantly buy into. In theory, they buy first, other users (or more snipers) buy after, the token price goes up, and the first sniper dumps all its coins. To avoid this, we recommend using the feature to snipe your own token on Solana.
Can someone scoop up all the tokens when liquidity is low?
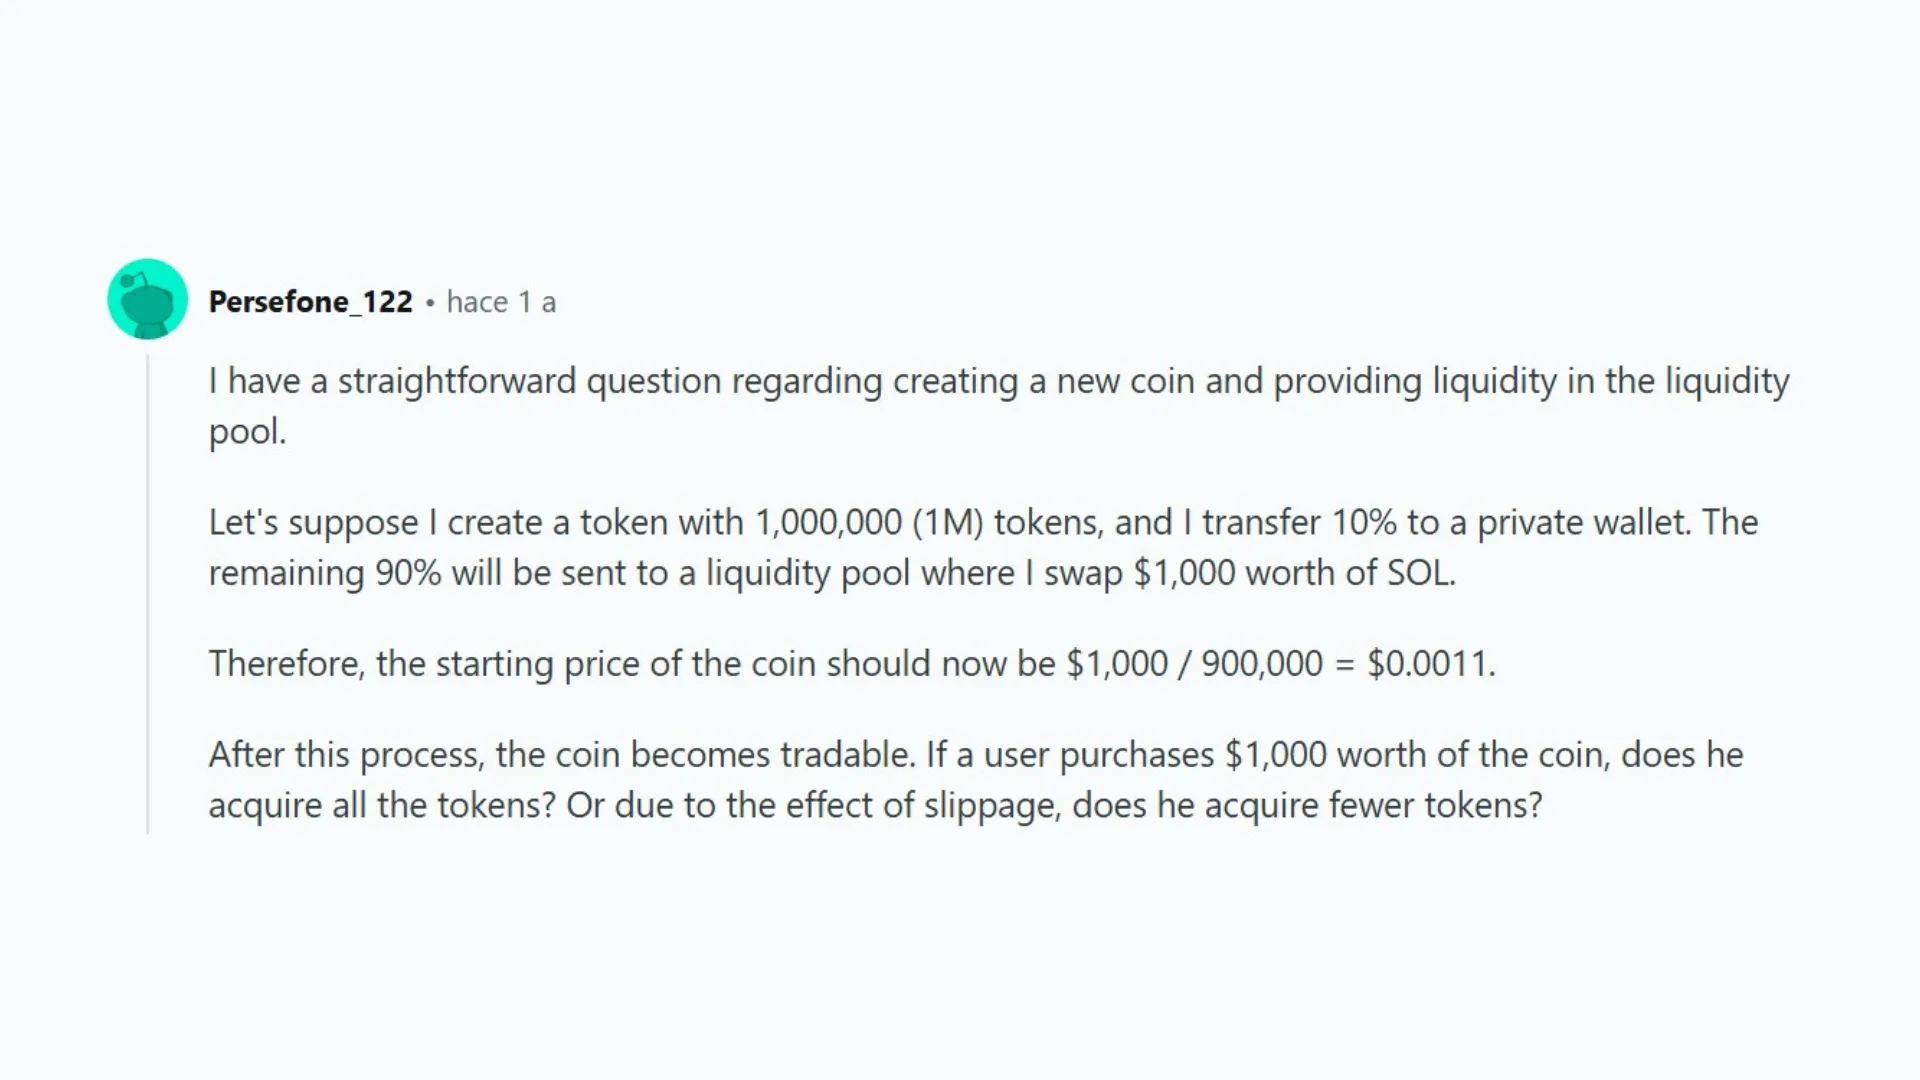
This Reddit user’s question is a fair one: if liquidity sits at $1,000 and someone buys $1,000 worth of tokens, do they walk away with all of them? The answer is no. It comes down to how AMMs (Automated Market Makers) work, the automatic protocol DEXes use to set prices and execute transactions. In this hypothetical, the token price adjusts automatically as the buy goes through, which causes the price to grow exponentially, so the buyer ends up with a small amount of tokens, not the full supply.
That way, another $1,000 gets added to liquidity, but the user walks away with a token amount that depends on the bonding curve. If you want to dig deeper, check out our article AMM vs CLMM, which compares the two protocols currently in use.
How do I make my Solana token immutable?

An Immutable Token (shown as “Revoke Update” in the Solana Token Creator) won’t be able to change its metadata in the future. To make your token immutable, just click “Revoke Update” or use the Make Token Immutable tool.
Can you create a token on Solana with no gas fee?
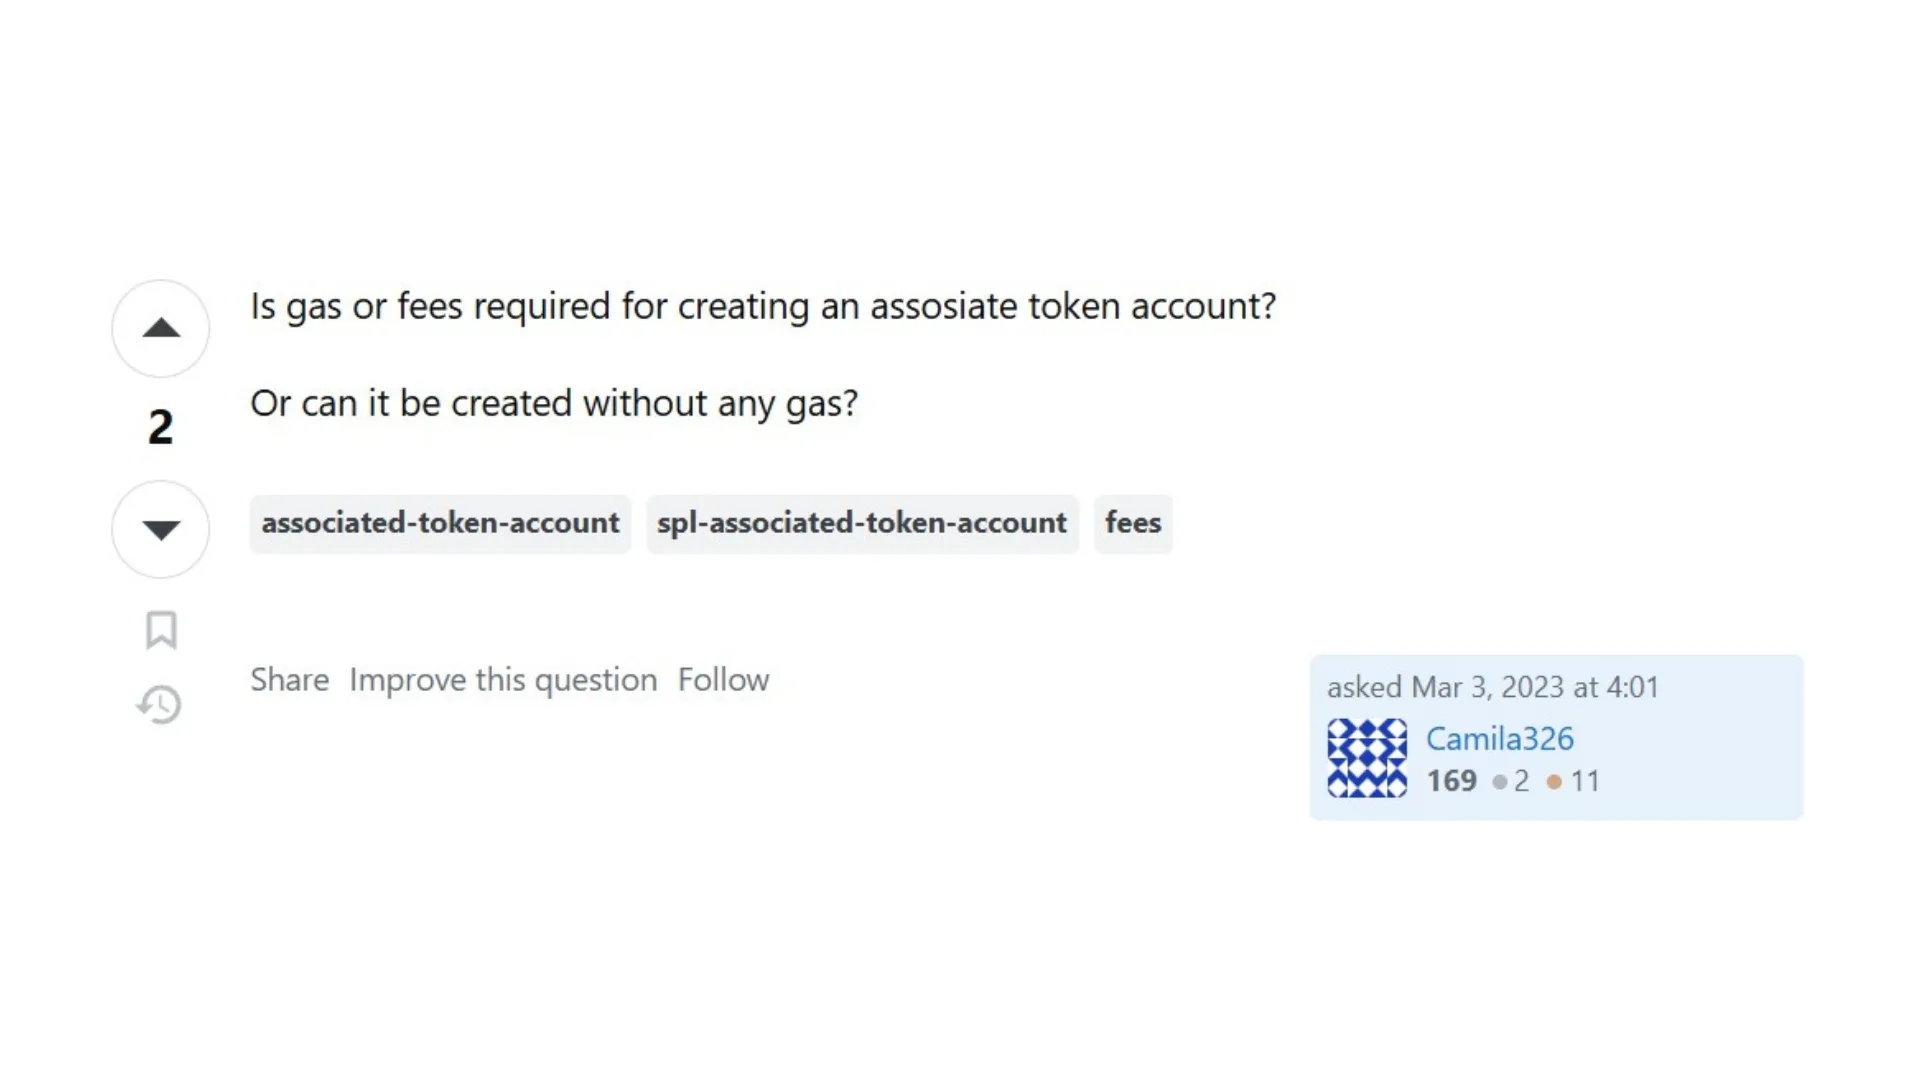
No, you can’t create tokens without spending gas fees, which usually run around 0.002 $SOL. Smithii includes the gas fee inside the Total Cost, adding 0.3 $SOL for using our platform to create a token on Solana.
You can also create a token on Solana for free, but to do that you’ll need to use commands and have technical programming knowledge. In that case, however, you wouldn’t be able to take advantage of the features only available on Smithii, and you’d still have to pay gas fees.
Conclusion
Now that you know how to create a token on Solana and that you can customize it however you want without knowing how to code, all that’s left is to click “Create Token”. If you want to go deeper into the ecosystem, join our newsletter to stay on top of all the Pro Tips for managing your project at any time.
Deploying the token is just the start of the project. To follow the full journey, from the wallet all the way to listings, check out our ultimate guide for devs on Solana, where you get every phase explained from start to finish.
Launch your token with our free E-book!
Sign up to get the best setups and tips for launching a token or meme coin.


CEO & Co-Founder at Smithii. Building on Solana since 2021 and sharing playbooks from the trenches. Also founder of Lince after years investing in DeFi.