
How to Add Social Links to DexScreener (and Improve Your token Info)
The more information you share about your project, the better it looks to every investor browsing tools like DexScreener. That’s exactly why knowing how to add social links to DexScreener matters.
If you’re creating a token on Solana and want to add social links on DexScreener, you can do it right during the creation process, as shown below.
There are also other ways to change or update your token metadata on DexScreener, and we’ll cover those too. Read through to the end.
How to Add Social Links to DexScreener: Full Guide
DexScreener uses official channels to verify that the information you submit in the form is accurate. So make sure your social media links are already included in your token metadata.
The ideal moment to add them is during creation. The process will vary depending on whether your token is on Solana or on Ethereum (including Layer 2).
Adding Social Links to a Solana token on DexScreener
If you haven’t yet created your token on Solana, just head to our tool and enter your social media details before creating the token. Once there, click “Add Social Links & Tags” to expand the URL fields and paste in your links. Like this:
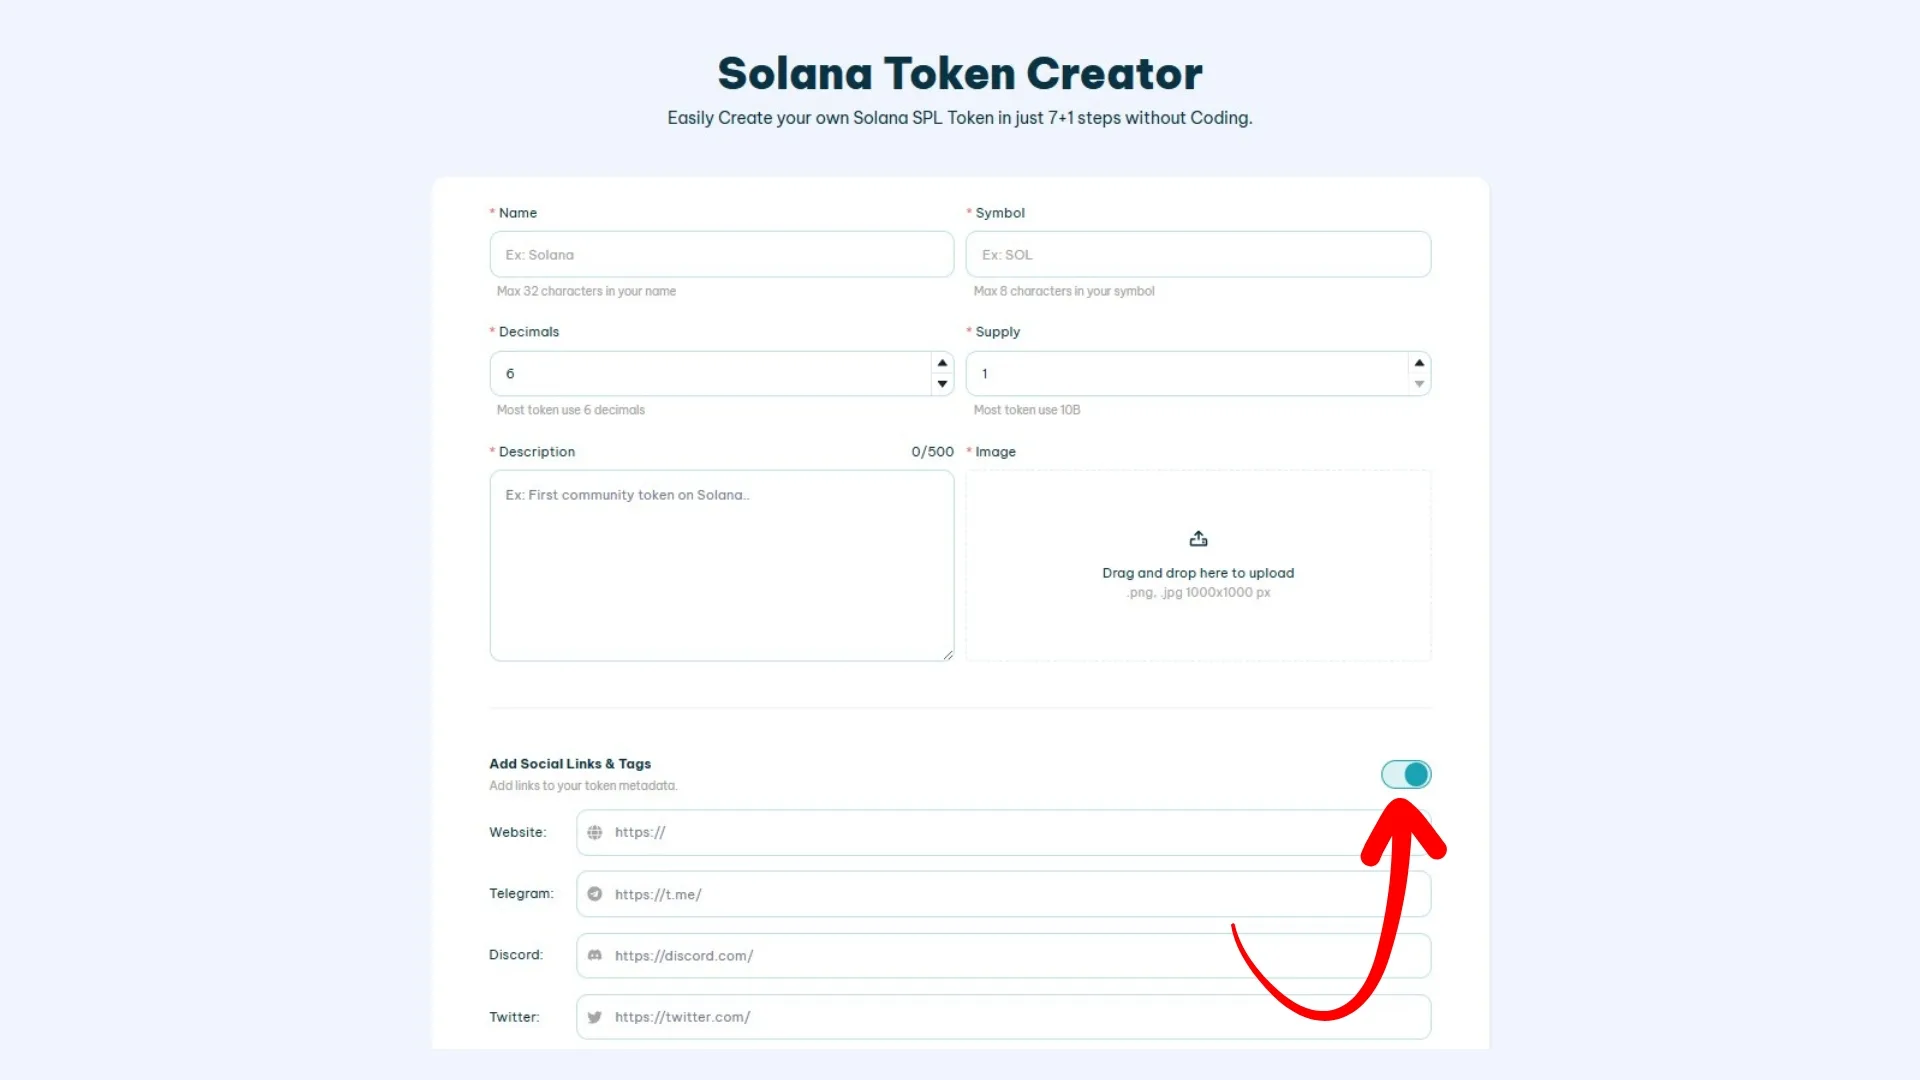
Once you customize your token to your liking, social links on DexScreener will be added automatically since they’ll be baked into your token metadata.
Adding Social Links to a Ethereum or Layer 2 token on DexScreener
If you have a token on Ethereum, Base, or Polygon, make sure you have access to the wallet that created the token, your contract address, and an account on the relevant blockchain explorer like etherscan.io for Ethereum. Here’s what you need to do:
- Exact Match Verified: Go to the block explorer, enter the contract address for your token, and complete the contract verification and publication process.
- Verify Address Ownership: In your explorer profile, verify ownership of the token by connecting the right wallet and approving the required transactions.
- Fill Out the Update Form: With both verifications complete, you can add your logo and social media links by filling out the token meta update form on each explorer. Search Google for “Token Info Submission Guidelines + your explorer” and open the result to find the form.
If you need a more detailed walkthrough, check out our full guide.
How to Get Your Social Links to Show Up on DexScreener
If you created a token using our tools, DexScreener will automatically detect your social links. Our dApp handles all the key transactions so your token shows up on DEX and screeners alike.
According to DexScreener’s own documentation, the information shown on their platform is pulled from token listing sites like CoinGecko. Alternatively, you can pay for the Enhanced Token Info from DexScreener, a feature that lets you add exclusive information and stand out from the thousands of other tokens on the platform.
That said, this option requires a payment of $299 USD, as shown in the image below:
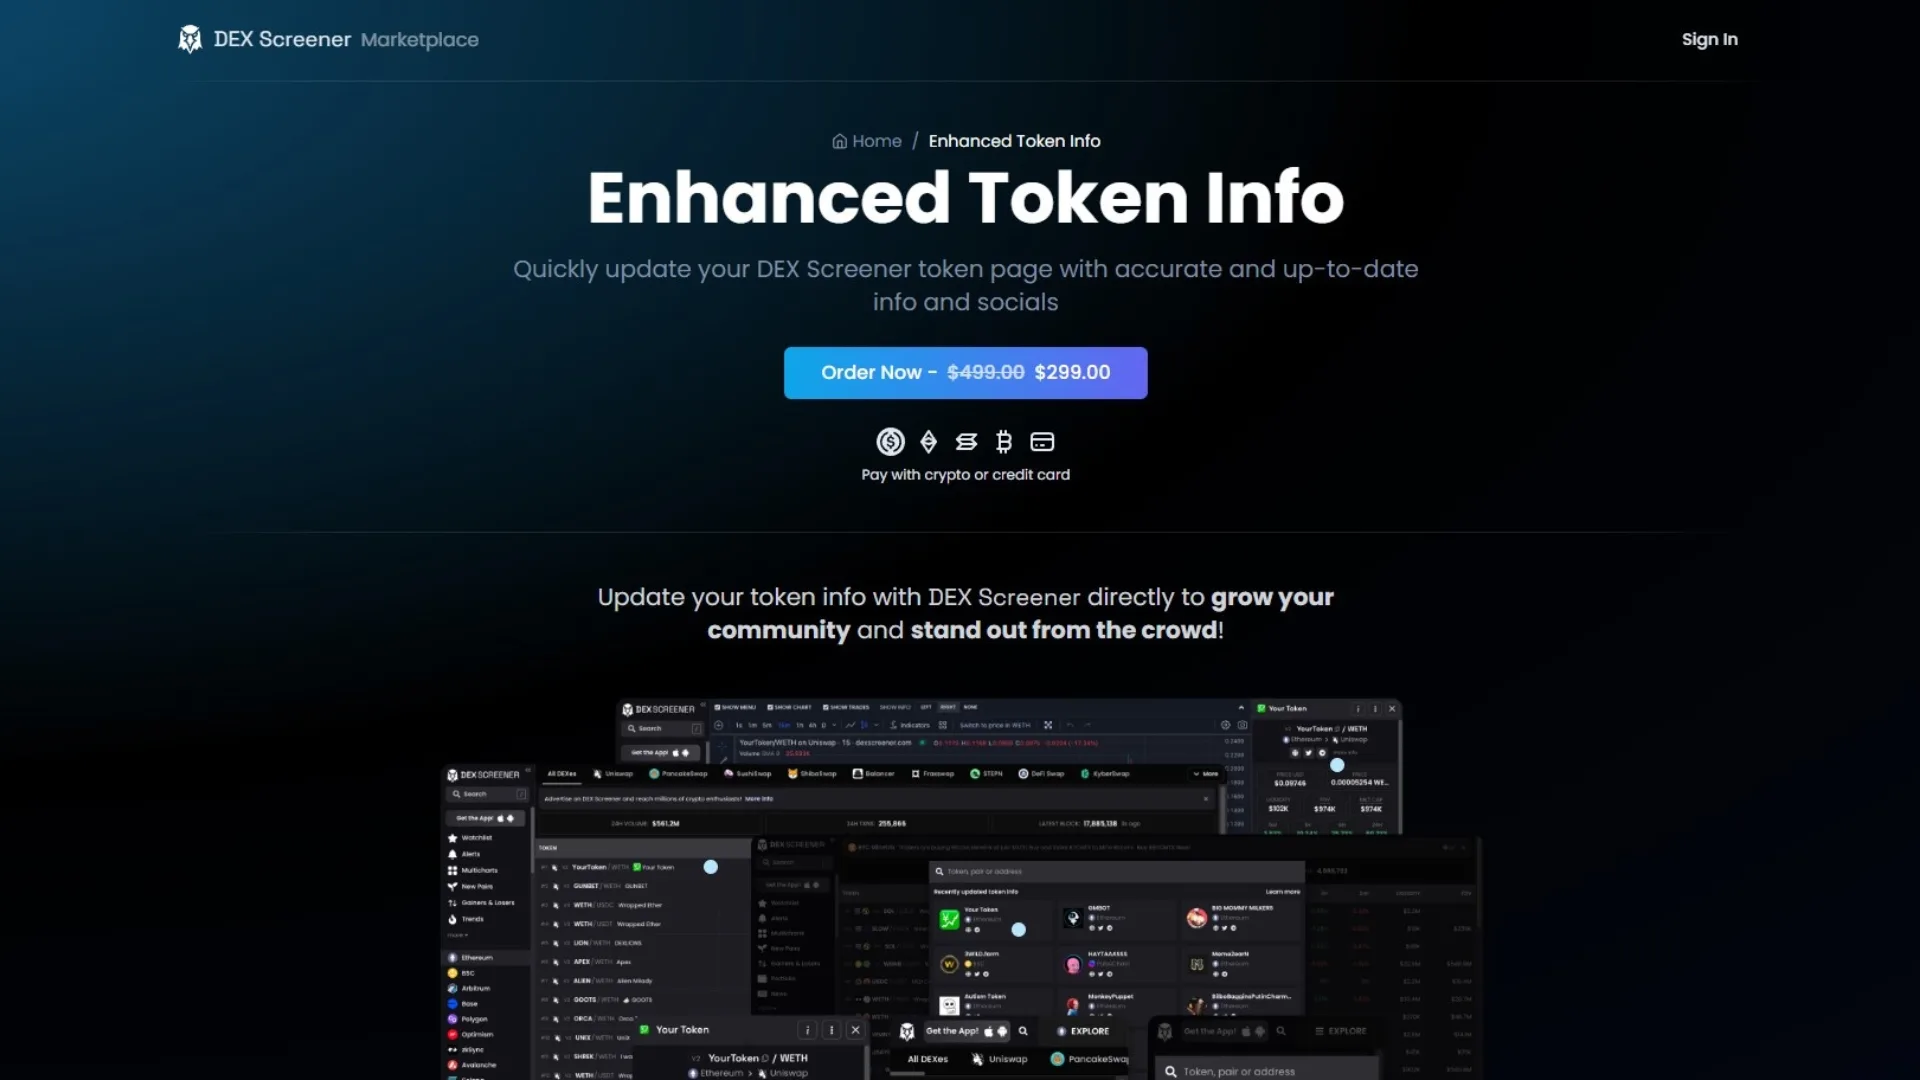
If you want to update your token metadata on DexScreener (and your token isn’t an immutable token yet), you have two options:
- Use our metadata update tool.
- Update it manually through listing platforms (tedious and time-consuming).
Either way, you’ll need access to the wallet that created the token and must verify the token. For a full step-by-step guide to updating social links on DexScreener, check out the dedicated guide on our blog.
How to Fill Out the DEX Screener Form for Enhanced Token Info
To improve your token’s visibility and information on DEX Screener, you’ll need to fill out a specific form in their marketplace. Below is a breakdown of each section and how to complete it:
Token Information:
- Chain Selection:
Choose the blockchain your token is deployed on, such as Ethereum, Binance Smart Chain, and others. - Token Address (Token Address):
Enter the contract address of the token you want to update. Make sure it’s correct, as this links the metadata you submit directly to that token. - Project Description (Project Description):
Write a clear, concise description of the project behind the token. Plain text only, but emojis and line breaks are supported. This description will appear on the pair detail page for your token. - Links (Links):
You can add multiple links related to your project:
- Website: Add the official project website.
- Documentation: Link to the project’s official docs, such as the whitepaper.
- Social Media: Add links to X (Twitter), Telegram, Discord, and more.
- Additional Links: Any other relevant links that don’t fit the categories above, such as profiles on other platforms.
Images:
- Token Icon (Token Icon): Upload a square image (1:1 aspect ratio), at least 100px wide. High resolution is recommended; DEX Screener handles compression on its end.
- Token Header or Banner (Token Header): Upload a rectangular image (3:1 aspect ratio), at least 600px wide. This appears on the token pair page. Your X (Twitter) profile banner works well here.
Other Options:
- Locked Supply (Locked Supply) (Optional):
If your token has addresses holding locked tokens, list them here along with a brief explanation of why and how the supply was locked. Standard burn addresses don’t need to be included; DEX Screener checks those automatically. - Contact Info (Contact Info) (Optional):
Add your Discord or Telegram handle if you want DEX Screener to reach you quickly with any questions or clarifications. This can speed up the approval process.
The service costs $299, with an average processing time of under 15 minutes after payment.
FAQ: Metadata on DexScreener
There are a few questions we didn’t want to leave out of this post, ones our community keeps asking. This section covers the most common ones. (Got another question? Drop it and we’ll answer it.)
What size should the DexScreener Banner be?
If you’ve paid for the Enhanced Token Info feature, you can upload a banner that shows in your token’s info section. The banner must have a 3:1 aspect ratio with at least 100px on each side, but we recommend 600px wide by 200px tall.
Why can’t I update my social links on DexScreener?
You can email DexScreener directly to have your metadata updated after changing your token. Keep in mind you’ll need access to the wallet that created the token to update its metadata and confirm that the token is mutable.
How do I add social links to my token on DexScreener?
If you haven’t created your token yet, use the Solana Token Creator by Smithii to include social links, and DexScreener will add them automatically. If your token is already live and you forgot to add links, use our metadata update tool or verify you’re the creator on the blockchain scanner and request a metadata update.
Conclusion
Now you know how to add social links on DexScreener, a key step that makes your token stand out from the rest of the listed tokens. Keep in mind that they’re a core part of your marketing strategy and help build trust with anyone who finds your project through the platform.
What are you waiting for? Add your project’s social links on DexScreener now. Don’t miss out on the visibility boost.
Trend on DexScreener with Our Free E-book!
Sign up to get the best settings and tips for reaching the top of DexScreener.


Industrial Engineer turned Solana trader. Marketing at Smithii and contributor to the $SHRIMP memecoin launch.