

How to create a token on Arc quickly and safely (no code, paying in USDC)
If you’re looking for how to create a token on Arc without writing code and without having to buy a volatile gas coin first, this guide has you covered. Arc is Circle’s Layer 1, with one twist that changes the whole math: gas is paid in USDC, so deploying costs a fixed dollar amount, not a moving estimate.
The Smithii Token Creator deploys a standard ERC-20 for you and verifies it automatically on the explorer. Below you’ll find the step-by-step, and after that, what each optional feature does so you only enable the ones you actually need.
What you need to deploy an ERC-20 on Arc
- An EVM wallet connected to the network. The one you already use on Ethereum works: MetaMask, Rabby, or any WalletConnect-compatible one.
- USDC in that wallet, which covers both the fee and gas. If you don’t have any on the network yet, you’ll first need to bridge funds from another chain. No other asset required.
- Name, symbol, decimals, and supply decided, since these are the four values that get written into the contract.
Arc is live: mainnet launched on September 16, 2026, and the Smithii tooling for the network has been working since day one. Being a freshly launched chain, it still has little competition for attention, which is exactly when a new token has the easiest time getting noticed.
What follows deploys a standalone ERC-20, which is what you want if you’re after a contract of your own, under your control. If your plan is to launch straight into a launchpad with the initial buy included in the same transaction, the alternative is to launch it paired with a tokenized stock.
How to create a token on Arc step by step
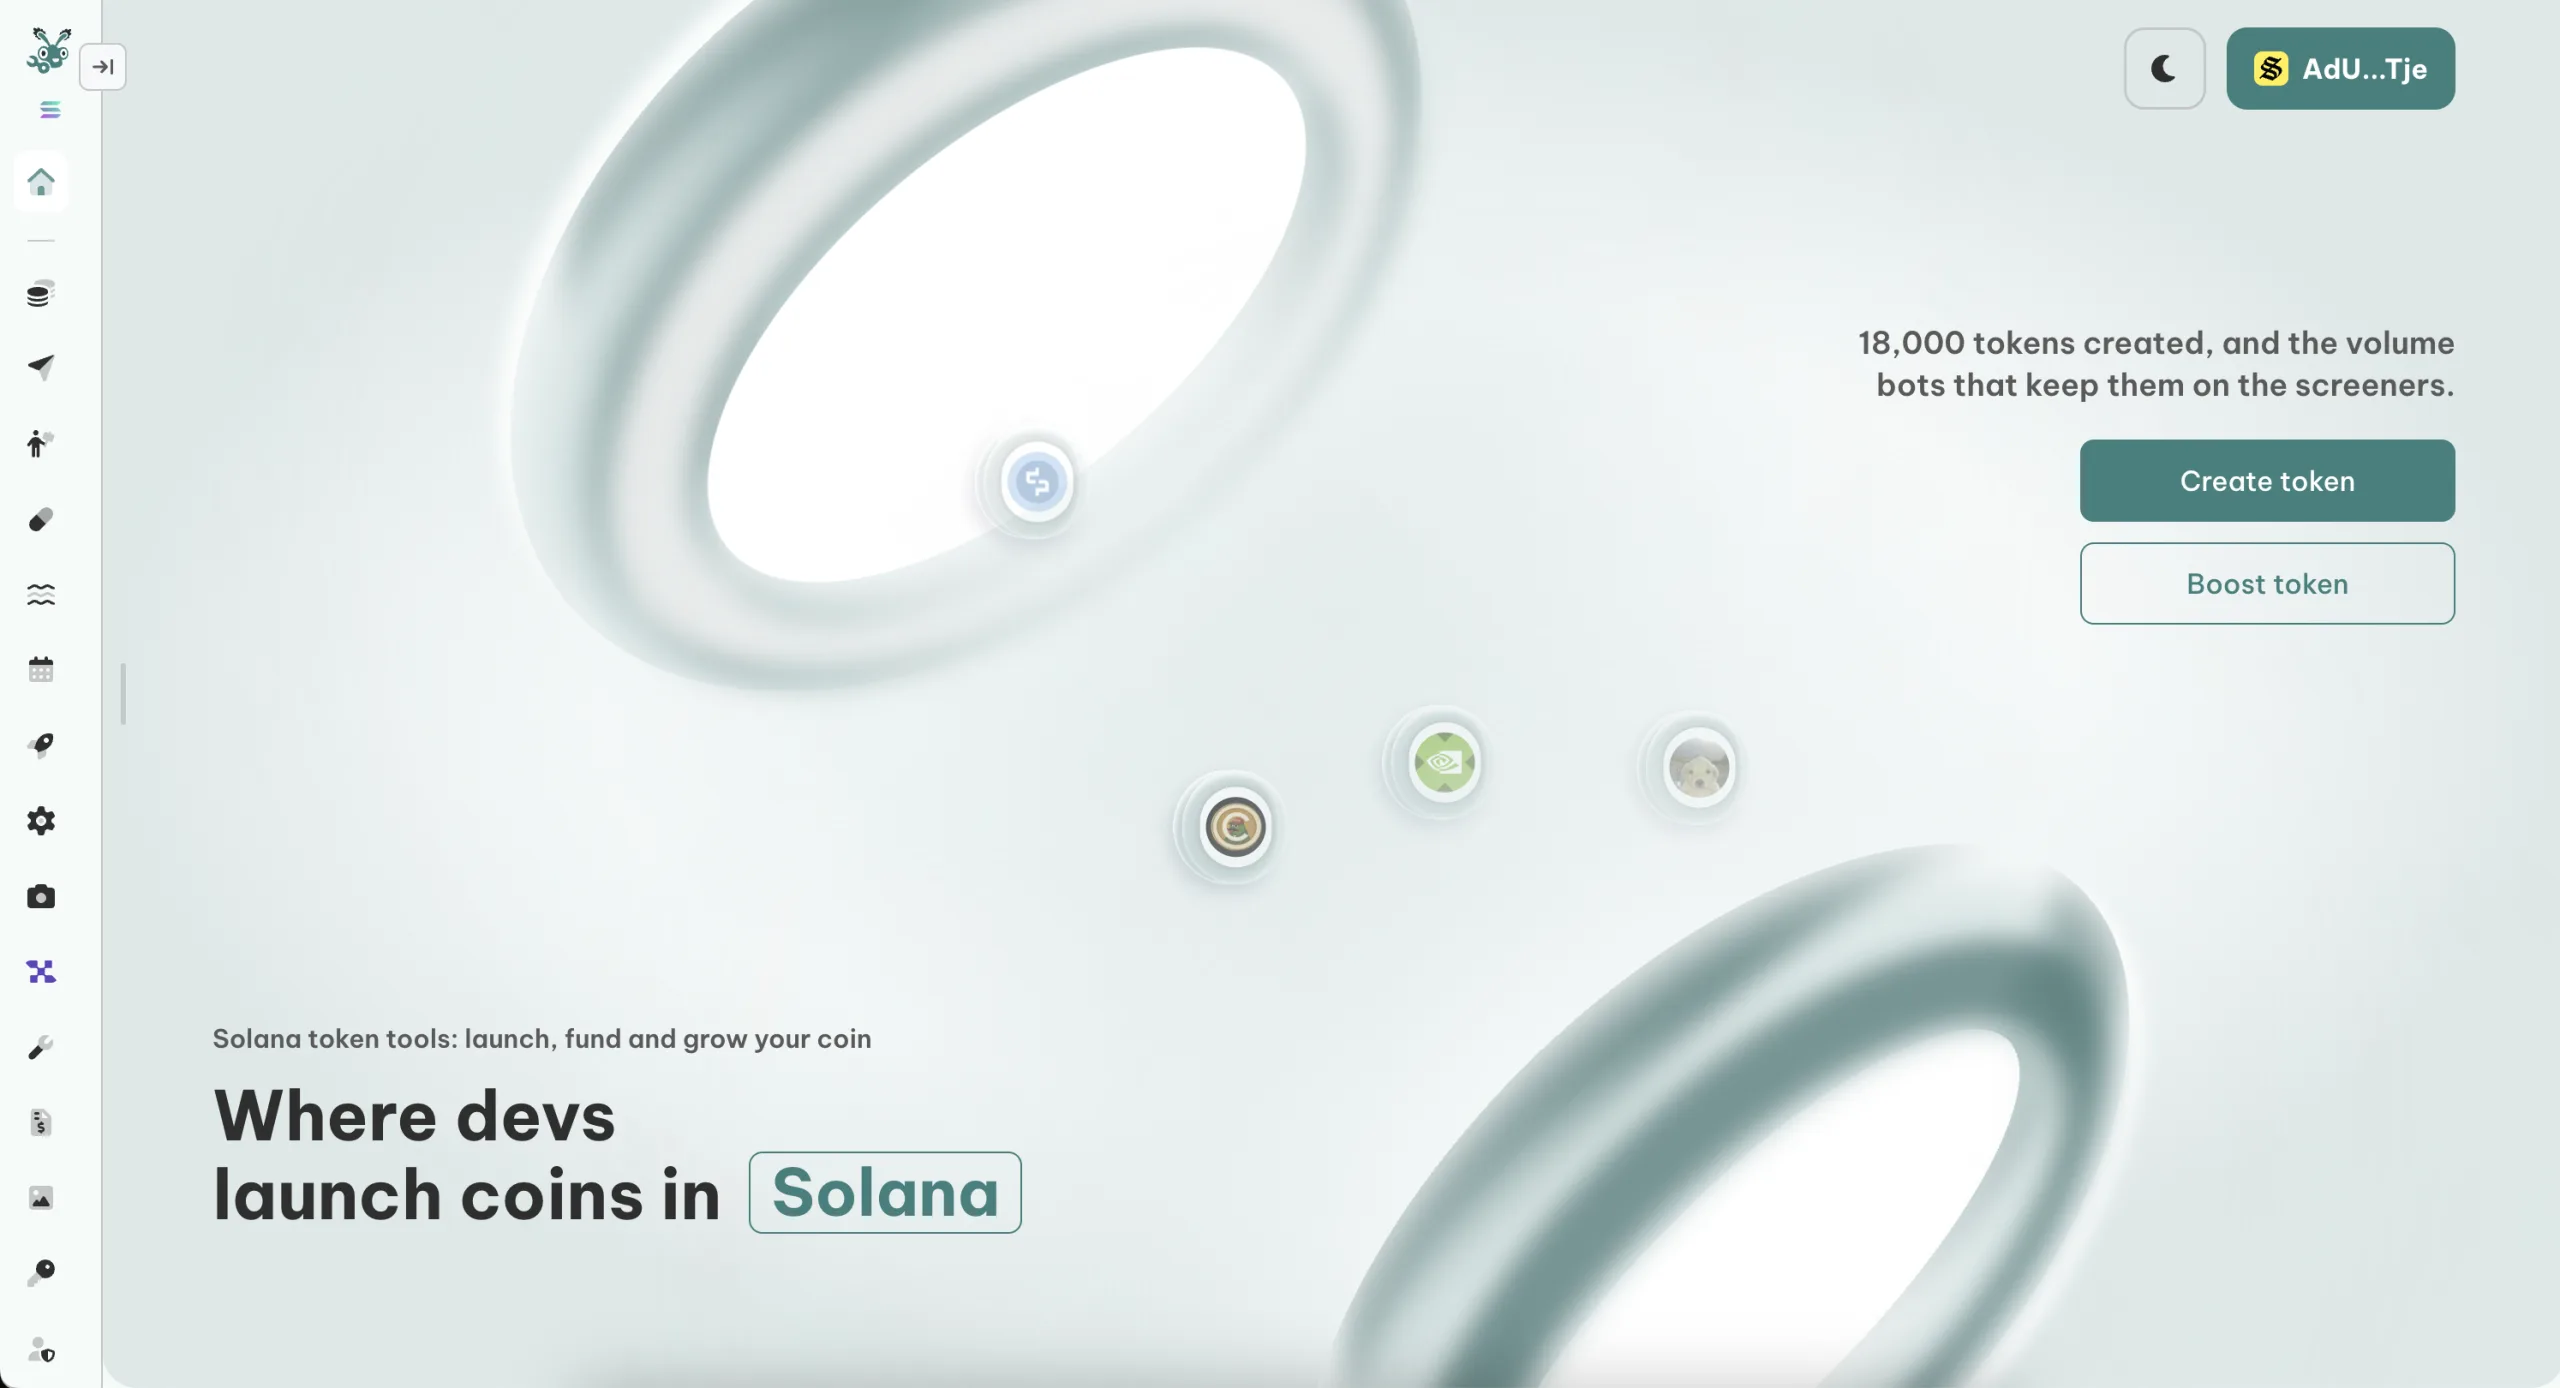
The Smithii Token Creator for Arc compiles and deploys the contract from your browser, no IDE, no Solidity, and the resulting bytecode is the same you’d get from a deployment on Ethereum. On top of that, it publishes the code on the Arc explorer as soon as the transaction confirms, so you don’t have to verify it manually afterward. When you open it you’ll see this interface:
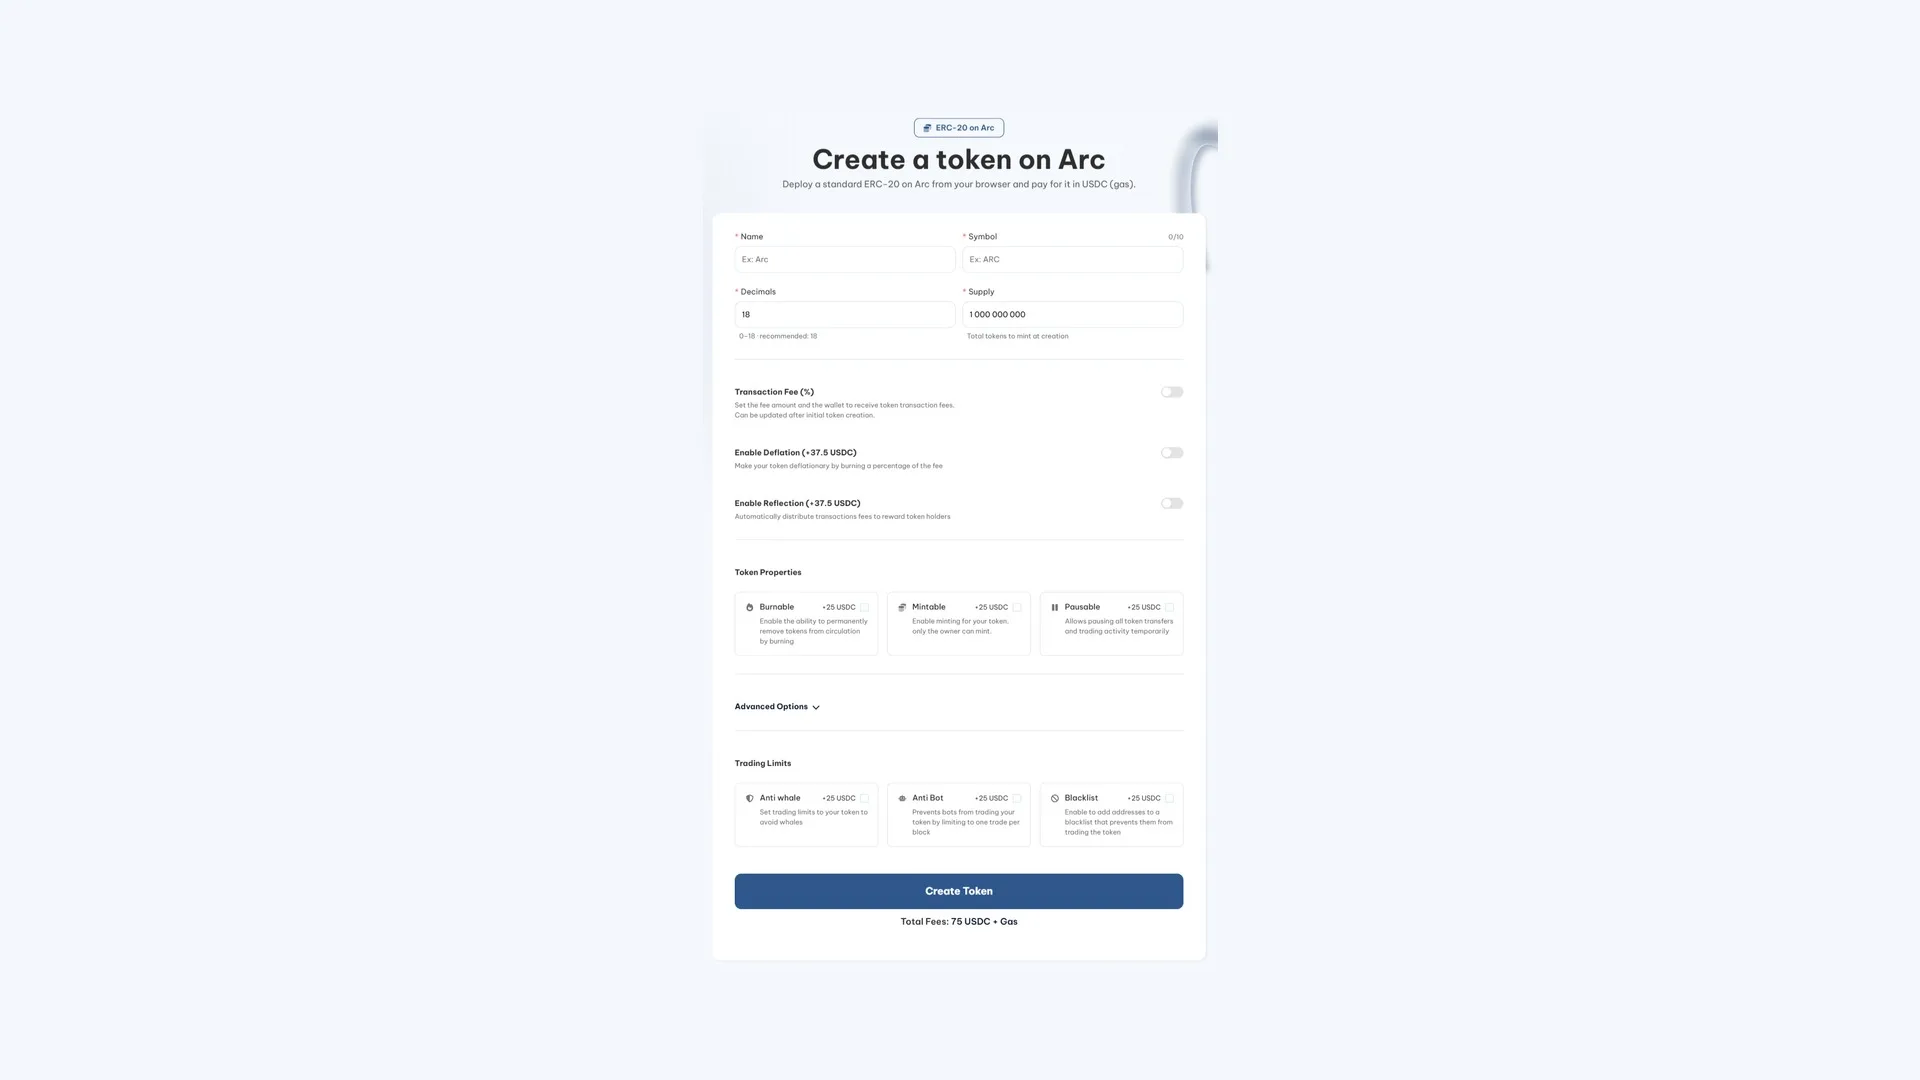
With your wallet ready and the four token values decided, the process goes like this:
- Connect your EVM wallet to Arc. The signing address will be the contract owner and the one that receives the supply.
- Set name and symbol, and fix supply and decimals. These four fields are what define your token.
- Enable any optional features you want: mint, burn, pause, anti-bot, or fees. They come off by default.
- Check the price, shown in USDC and already including anything you’ve added.
- Sign once and the contract deploys. It’s a single transaction.
- Check the verified contract on the Arc explorer to confirm the code is published and share the link.
How much it costs to deploy the contract on Arc
The base deployment is 75 USDC plus the gas the transaction uses. And here’s what makes this network interesting: that gas is also paid in USDC, since it’s Arc’s native currency, so the whole bill stays in dollars.
Sounds like a minor detail, and it isn’t. On any other EVM chain, the budget for launching a token depends on where the native coin sits the day you sign, and that number can swing 20% in a week. On Arc there’s no gap between the price you see and the amount you pay, and you don’t need to buy an intermediate asset just to be able to deploy.
Optional features are charged separately: 37.5 USDC for Deflation or Reflection and 25 USDC for each of the others. A basic token comes out to the 75 USDC base; one with all six properties enabled lands at 225 USDC. The updated total shows up in the form before you sign.
What each optional token feature does
Arc is EVM, so the features are the same ones you already know from Ethereum, Base, or Monad. They all come off by default and are written into the contract at deployment time, so it’s worth understanding what each one does before checking the box.
Fees and distribution
Transaction Fee. Charges a percentage on every buy and sell and splits it between several wallets you define. Useful for funding marketing or treasury without selling your own supply. It’s one of the few you can adjust after the token is created.
Deflation (+37.5 USDC). Burns part of every transaction, taking it out of circulation for good. Fits if your project leans on scarcity: the more the token trades, the less supply remains.
Reflection (+37.5 USDC). Automatically distributes part of the fees to holders. Rewards those who hold and makes casual trading less attractive.
Contract properties
Mintable (+25 USDC). Lets you mint new supply after deployment, and only from the owner wallet. Useful for phased emissions or reward programs. If your pitch is fixed supply, don’t turn it on: it’s the first thing any buyer checks.
Burnable (+25 USDC). Lets you manually destroy tokens whenever you decide. Handy for announced burns: project milestones, buybacks, or clearing leftover supply from a airdrop.
Pausable (+25 USDC). Freezes all transfers while it’s active. It’s the emergency button if you spot an exploit, instead of watching the pool get drained. It’s also a power your community will eventually want to see you hand over.
Trading limits
Anti Bot (+25 USDC). Caps operations per block so a bot can’t sweep the pool the second you launch. It’s the most useful protection right in the first few minutes, when the pair is most exposed.
Anti Whale (+25 USDC). Sets a cap on how much a single address can hold or move. Prevents a wallet from stacking a position big enough to tank the price on exit.
Blacklist (+25 USDC). Lets you block specific addresses from trading the token. It’s the last-resort tool against a known attacker, and also the one that raises the most red flags if you don’t explain why it’s there.
The rule when picking: only enable what you’ll actually use. Every function adds logic to the contract, and unused logic is attack surface, extra cost, and one more question to answer when someone audits your token.
Why Arc doesn’t look like other EVM chains
Technically you’ll work exactly like on Ethereum: same ERC-20 standard, same wallets, same functions. What changes is the environment.
| Aspect | Typical EVM chain | Arc |
|---|---|---|
| Gas currency | Volatile native asset | USDC, so the cost is a dollar figure |
| Validators | Open, anyone can join | Institutional backing, not an open set |
| Finality | Seconds to minutes | Sub-second |
| Focus | General purpose | Payments and finance with stablecoins |
Network governance is the piece you most need to understand before picking Arc. It launches with an unusual level of institutional backing, with financial entities among its founding validators, and that puts it in a different spot than an open chain: more predictable, but also further from permissionless decentralization.
If your project is about payments, settlement, or anything where cost stability matters more than the decentralized ideal, it fits. If you want a permissionless chain on principle, there are better options.
What to do with your freshly deployed token
A deployed and verified contract still isn’t tradeable. It’s missing the market that gives it a price, and that’s where a liquidity pool comes in: you pick which asset it pairs against and how much depth it has, and those two numbers lock in the starting price.
If you’d rather not put up your own liquidity, over at Tolly the token launches with its USDC pool and liquidity locked from day one.
Later on, if you’re planning to distribute it across a community, the batch sender for thousands of addresses handles it in a single signature. And if at some point you want to close the contract so nobody can touch it, that call is made from the token management panel.
Before showing it to anyone, it’s worth checking what signals your contract returns, because that’s exactly what anyone considering a buy is going to look at.
FAQ
How much does it cost to create a token on Arc?
75 USDC for the deployment, plus the gas the transaction burns, which is also paid in USDC since it’s the network’s native currency. Optional features add on top: 37.5 USDC for Deflation or Reflection, and 25 USDC for each of the others. The total shows up in the tool before you sign, so there are no surprises between what you read and what you pay.
Does creating a token without code on Arc give you a standard ERC-20?
Yes. Arc is EVM-compatible and the bytecode deployed is identical to what you’d get from a Ethereum deployment. It works with the usual EVM wallets and the tools you already know, no adjustments needed.
Do you have to verify the contract manually?
No. The source code is published on the Arc explorer automatically as soon as the transaction confirms, so the contract ends up verified without you lifting a finger. It’s a step that on other chains you have to handle separately, and here it comes built in.
Can I change the name or symbol later?
No. The name, symbol, decimals, and initial supply are written into the contract at deployment and can’t be edited. Review them carefully before signing, because fixing a typo would mean deploying another contract from scratch.
What wallet do I need to operate on Arc?
Any EVM wallet works: MetaMask, Rabby, or any WalletConnect-compatible one. No network-specific install required. The wallet that signs the deployment becomes the contract’s owner and receives the supply, so connect the right one from the start.
Conclusion
Deploying on Arc feels like deploying on any EVM chain, with two differences you’ll appreciate: the budget is a dollar figure that doesn’t move, and the contract gets verified with no extra work.
What still deserves time is the list of optional features, because they’re written in forever. Decide which ones you actually need before signing and leave the rest out. If you want the technical breakdown of the network, it’s in Circle’s official presentation of Arc.
After creating the token on Arc, there’s still the distribution, the launch, and the project’s security to handle. You’ve got them all, start to finish, in the definitive guide for devs on Arc.

Content creator and SEO contributor at Smithii. Systems Engineering student and crypto-tech enthusiast.